Search the Community
Showing results for 'create bootable grub2 image'.
-
Long time imgburn user and contributor. About to burn my first M-disc. I have a LG full height player that says M-disc on it's front (Model BE16NU50). 100G M-disc, this will be a data file backup. What are the best settings to create this disc with? : Mode 1 or 2? UDF only or UDF+ISO9660, or something else? Which UDF revision? Anything else I need to know? Damn discs are pricey, I want to get it right on first try for obvious reasons.
-
Hi i've been using dvd decrypter and i just installed imgburn to see if it's better,but i can't figure out how to create an iso image file of a dvd?With dvd decrypter i just go read and it will creat one.can anyone tell me how to create an image of a dvd using imgburn?
-

M-Disc for data backup, proper "Image Options"
dbminter replied to getgray's topic in ImgBurn Support
I'm not sure if you need an M-Disc drive to read a written M-Disc BD-R. I know with M-Disc DVD, as long as you have a drive that reads DVD+R, it will read M-Disc DVD's. I believe even standalone DVD movie players will play DVD Video discs burned to M-Disc DVD's if that player supports playing DVD+R. I believe M-Disc was specifically made for this kind of compatibility. So, I'd guess an M-Disc BD-R burned in an M-Disc capable drive would read on a standard BD drive. Be aware, of course, since you used a TL disc, you'd need a BD drive that supports reading TL media, and not all BD drives do. Of course, if you always buy an M-Disc capable drive, you won't have to worry about it not being able to be read back in. As for restoring, it depends on what you backed up and how you backed it up. If you used ImgBurn to just add files and folders to an image file job, then all you can do is use File Explorer to drag and drop the files/folders in Windows/File Explorer and replace the files in the destination if they already exist. If you're more concerned about restoring an entire drive from disaster, you'd be better off investing in a drive imaging application like Macrium Reflect (Which is what I use and also offers file and folder backups.) or True Image (Which I've used in the past but don't recommend any longer and it used to support file and folder backups 10 years ago when I last used it.). So, if you're looking to restore something like Windows, then Windows/File Explorer isn't the way to go as you can't just replace files in Windows/installed applications and expect it to work. You'd be better off served by an imaging application. And what you can do is create images to a local HDD and then use ImgBurn to copy these images to an M-Disc for archival purposes. -
Hello, I've installed Imgburn because is one of the very few burners able to decently manage old mixed mode discs (1 session: 1st track data, next tracks audio) for ancient Amiga/PC games of the '90... I also have Daemon Tools 10.10 Lite to mount and convert between file formats (bin+cue, nrg, mds/mdf....) and here is the problem with Imgbrun: trying to load a mds/mdf it reported a "Error: can only open mds version 1.x, this one is 2.1" :-( then with a .nrg file of a mixed mode CD it says can only manage nrg files single track :-( ...so my question is: will these formats compatibility improved anytime soon? It is a great burning software but the partial compatibility with some common formats make it... meh... for some tasks. Last question: can ImgBurn burn/create images in Enhanced CD mode ( https://en.wikipedia.org/wiki/Blue_Book_(CD_standard) ) too?
-

Better support to nrg and mds/mdf, and mixed mode
Hexaae replied to Hexaae's topic in ImgBurn Support
Thank you for reply. Those files work fine with AnyBurn for example… mmh, but it must be closed source too (I'm not sure). Yes, can burn Enchanced CD starting from BIN/CUE, but can create them too? Can it create an image file from a new project with: 1st session with audio tracks + 2nd session with data track in CD-ROM XA Mode 2, Form 1 format? -
Sorry if this has been asked before, but do you plan to add the ability to create a compilation and build without the ISO creation part? I know you can just build an ISO and burn but I miss the ability to pick individual files within dirs like Nero's Data Disc creation method. What about a "CD Copy" like function, too? Thanks for the awesome app!
-
I would like to burn DVDs with 5.1 Surround Sound that will play in my home theater system Have managed to work in Premiere Pro CC 2019's latest update and create an exported file which contains 5.1 surround sound. Now need to burn a DVD with that type of sound. Which exported file type would be best for ImgBurn to create such a DVD? Thanks for info. Bert
-
I think you're barking up the wrong tree here. ImgBurn will only burn DVD's with VIDEO_TS folders you give it. So, Premiere Pro CC 2019 created a file for you, but you'll need to convert that file to some kind of VIDEO_TS DVD folder. You'll need something like ConvertXToDVD or similar conversion/encoding software to create a VIDEO_TS for ImgBurn to burn. Unless you just plan on putting this Premiere Pro file on a disc and you have a DVD/Blu-Ray player that will play container files. Then, it depends on what file formats your player supports. If that's the case, ImgBurn won't care what file format it is. What will matter is what kind of file systems your player supports from disc.
-
Hopefully the topic of this post makes sense. When using Build mode, I assume that ImgBurn has to actually build a temporary image file that is located somewhere on disk and is then burned to CD/DVD. My question is: where are these temporary image files created? I am using Vista build 5536 and I am experiencing severe system slowdown during a build-and-burn process. I suspect that the "Search Indexer" which is always running in the background is attempting to index the location of the temporary files, thus slowing everything down. If I know where these files are created, I can exclude the location from the indexer. Anyone have any ideas? I looked in all the preferences and couldn't find an option to specify any temporary file location. Thanks.
-

TSSTcorp CDDVD SH-S202J SB03 won't read disc
dr_ml422 replied to dr_ml422's topic in ImgBurn Support
Thanks! I haven't used the quick ok in a while as I really didn't know what it did. I just use the Ok button. If I don't tick (enable) "preserve full path name" I have to leave it in the same folder with the source files. So when the queue is opened and you load a saved queue, it will not load it in if you moved the .cue file without ticking (enabling) "preserve full path name". I have a question regarding the edit function regarding tracks, titles,... After you make changes to say one track and you have to change more, do you simply go to the next tracks and ImgBurn automatically saves the changes? It must be that way because there is no save changes button other than Ok, and if you hit that it takes you directly to the next phase of creating the .cue. I was messing around with that yesterday for a long while because of one track having some character that couldn't be processed/parsed. It would create the .cue file without that track unless you edited it correctly. I couldn't for the life of me see how to save the changes until by accident I guess I proceeded with Ok and it finally took. Is there a reason other than anticipating the changes were made why a confirmation wasn't implemented? You could be in there for a really long time not knowing changes are made on the fly. The guide mentions the refresh button after editing. Is that the save button? Maybe I hit that by accident and finally was able to include that file? Has anyone suggested a save function after editing? Wouldn't be a bad implementation. Please let me know the correct method for editing and saving. Thanks as always. -

TSSTcorp CDDVD SH-S202J SB03 won't read disc
ianymaty replied to dr_ml422's topic in ImgBurn Support
The "Quick OK" button is described in the Guides - The ImgBurn Functions - Section [*]4.4 Create CUE File... Also the "Preserve Full Pathnames" is described there. -
Once you create a boot image from a CD using Create Boot Image, then when you load that file under Boot Image, how are we supposed to determine the Emulation Type to use based on that image file? Or based on the CD? Trial and error might work, except for the Custom part. Thanks!
-
TSSTcorp CDDVD SH-S202J SB03 won't read disc
ianymaty replied to dr_ml422's topic in ImgBurn Support
@ dbminter. No. He sure has the "Preserve Full Pathnames" unchecked and uses the "Quick OK" button to get to the burn point in the "Create cue file..." window. @ dr_ml422 If you are using "Quick OK" button you need to tick (enable) "Preserve Full Pathnames" box, than you can move the cue wherever you want if you want to save it for further uses. Otherwise you need to use "OK" button that will bring up a "Save as..." window to select a location and that will automatically enable Preserve Full Pathnames in the cue file even if it is unticked (disabled) in the "Create cue file..." window. -
TSSTcorp CDDVD SH-S202J SB03 won't read disc
dbminter replied to dr_ml422's topic in ImgBurn Support
The CUE files do not have to be in the same folder as the source files to burn an Audio CD with; I always save my CUE files to the Desktop for sake of easy finding and my source files are always all over the place, usually. The only thing I can think of that may be doing that for you is if you have Preserve Full Pathnames checked. Go into Create CUE File and see if that box is checked. If it is, try unchecking it and see if that helps. -
There are some weird compression cases where even less than 120 minutes of input will generate DVD-9 sized VIDEO_TS outputs. It's rare, but I use ConvertXToDVD to convert some containers in the past that were under 2 hours, but generated DVD-9 sized VIDEO_TS output. My only explanation was how the source file was authored. Some kind of compression that maybe didn't really compress very well. Or could be, as you say, the audio format of the sound track in the container might not have been a compressed one. I still don't understand what the OP is saying when you says he had 1 video title set (VTS) regardless of how he authored the input. Adding each "scene" as its own "chapter" would create a single VTS. Adding each scene on its own should create a VTS for each scene. Then again, I'm not familiar with the conversion software he's using, so it may behave oddly.
-
Hi Lightning Would appreciate if you could create a feature whereby IMGBURN can automatically create the VIDEO_TS.IFO and VIDEO_TS.BUP files after a movie titleset has been imported into BUILD. After this the image can then be constructed for burning. Currently I dont see a way that IMGBURN can create an image without these files also been in the folder concerned.
-
I was wondering if at some point in the future we might have a create folder option for the Build mode? I realize that may not be something to be offered until, and if, there ever is a "GUI" based implementation for Build mode, e.g. such as Nero. But, in Build's current configuration, I was thinking something that could be done was a create and then navigating into that folder as the windows main view. Then, Browse for a file works the same way. Or, use a + type of tree display, highlight a folder that is created, then any actions such as create further folders, add further files, etc. are added into that highlighted folder.
-
 Here is the screnshot mounted is an iso of a linux distro and here the verify that shows that imgburn actually sees both dvds. thanks
 -
You could always create a set of par2 recovery files for the image - so you can recover it if that should happen.
-
TSSTcorp CDDVD SH-S202J SB03 won't read disc
dbminter replied to dr_ml422's topic in ImgBurn Support
Actually, no, I had forgotten you had said anything about h264 output failing before with ConvertXToVideo. And if it does do that on episodic DVD's, I'd prefer it do it that way. I'd rather have each episode as a separate container. If you wanted to, you could take each container and use the Merge function in ConvertXToDVD to create a single title set. Anyway, let me know if that option change does any good. However, the software should allow the user to choose not to separate single episodes. I can understand why it does it, though, because the IFO's would, even taken all episodes as one giant VTS on the DVD as separate title sets. One thing I think I'll try. Taking the MPEG4 output into AVIDeMux and recode it as h264. See what I get. Let me see if I can recover the output from before and try that now. I was able to recover the deleted file from the old Windows where I tested ConvertXToVideo before restoring my live system image backup before testing it and another application I was trying out. So, now, AVIDeMux is recoding the MPEG4 video to H264. Didn't help out much. Just down from 931 MB to 720 MB. -
TSSTcorp CDDVD SH-S202J SB03 won't read disc
dbminter replied to dr_ml422's topic in ImgBurn Support
Had a chance to install the trial of ConvertXToVideo. EPIC failure creating MP4 with H264. Creates a file with audio but no video on MP4 and H264 video! However, I had multiple chapters in the Blu-Ray I used as input and the program did NOT create individual MP4 files for each chapter. There's no reason why the program should create individual MP4's for each chapter. I tried to recreate the file as MP4 with Mpeg4 as the video type. Got video in my file that time. Don't know why the H264 isn't working. I know I've got the necessary codecs because AVIDeMux will save nVIDIA H264 video in its output that plays, so it's probably some kind of bug in the ConvertXToVideo software. Ah, I think I may have discovered where your one file per chapter may be coming from. Under the setting in ConvertXToVideo, check under Chapters. Do you have the box checked that says Create one title set per chapter when loading a file? If you have that checked, try unchecking it and see if that doesn't improve your file set creation. That setting may only apply to DVD Video or BD Video creation, though, but it may fix the output behavior you've been getting. I tried creating to DVD Video and it seems to work fine. So, the H264 error would prevent me from using this software to do my DVD to container conversion. Mpeg4 is too large an output format. It creates 1 GB 10 minute files. But, it does work to convert BD Video. It does import all titles, the main feature and bonus features. -
It is possible, but I don't think ImgBurn can do it and I doubt you can do it with just the Create CUE File option if it is possible for ImgBurn to do it. What you'd have to do is create a disc with 2 tracks (Or is it sessions? I forget which one ImgBurn can't do.) one with the audio CD tracks on it and one with a 2nd bit where you'd store the data part of the audio CD.
-
Now, are you sure these stutters aren't in the original VIDEO_TS output you have? Try playing the DVD from the VIDEO_TS folder from the hard disk you're importing in Build mode, inferring you used Build mode to create this image. See if you get the same stuttering between sectors. It seems highly unlikely you'd get the same results from playback both on a PC DVD drive and a standalone DVD player unless it wasn't in the original video. The other common denominator is the DVD burner you're using. Maybe it isn't very good. I know LiteOn drives can add random pauses to DVD Video that aren't layer breaks. I don't know what track record the TSSTcorp CDDVDW SH-222AB has. What is the source of this image? Did you Build it from a VIDEO_TS folder or was the ISO generated by another application? Other application generated ISO's are well known for producing output that isn't right.
-
Generate a BIN file from a CUE file? Not with ImgBurn, no. What you'd need to do is burn the CD with the CUE and then create an image from that CD in ImgBurn to get a BIN/CUE file set. As far as I know, anyway.
-
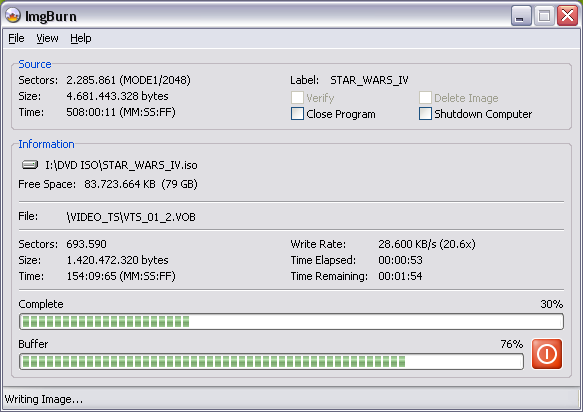
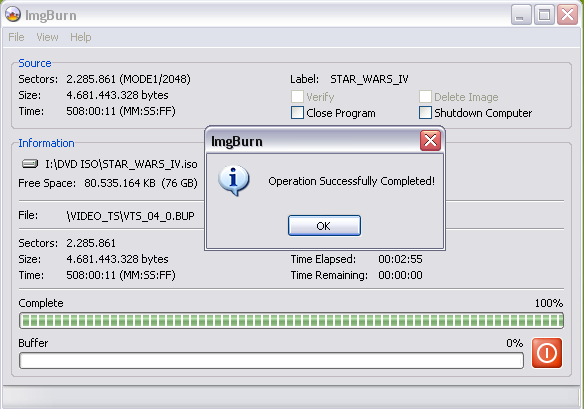
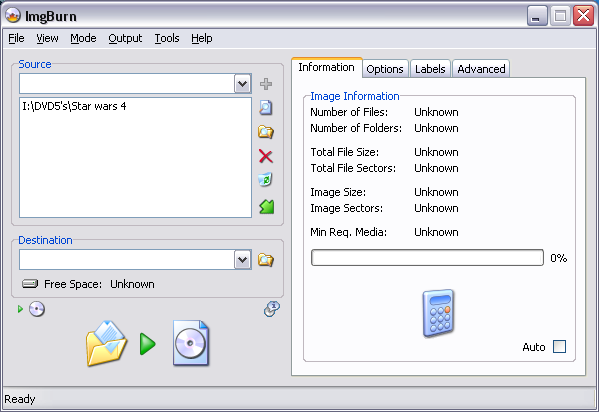
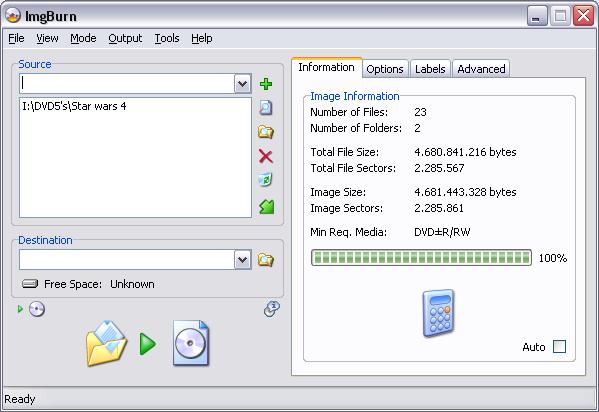
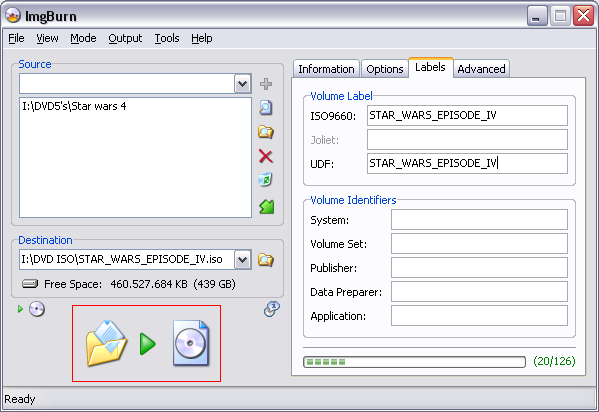
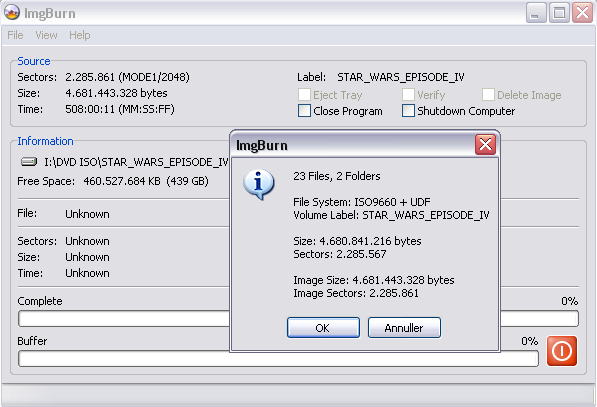
This will cover making a Single Layer ISO on your Hard Drive. Firstly make sure your Vob, Ifo and Bup files are in a folder called VIDEO_TS Next, open ImgBurn in Build Mode (Click 'Mode' -> 'Build') and switch the Output Mode to Image File (Click 'Output' -> 'Image File'). Click the 'Browse for a folder...' button in the source box, and navigate to the folder where you saved the files. When you have chosen the folder you require you can use the Calculator button to see if it will fit on the disc. At this point go to the 'Options' tab, and ensure ISO9660 + UDF is selected in the 'File System' drop down box. You should also configure the other options as you see them here in the screenshot. Next choose the 'Labels' tab and enter a nice name for your movie in both fields. This will be the 'volume label' of the disc once you've burnt it - it's what will be visible in 'My Computer' when you put the disc in your DVD drive. Now you need to enter the file name for your image file in the 'Destination' box. In this example, we use 'I:\DVD ISO\STAR_WARS_EPISODE_IV.iso'. You can enter it manually or click the 'Browse for a file...' button. When you've done that, press the Build Button. (Highlighted in the red box) You will then see the screen below: Press 'OK' and ImgBurn will start building your ISO. Then just wait a few minutes (system dependent) and your ISO and MDS (NB: MDS file is now optional for single layer discs) will be ready.