Search the Community
Showing results for 'create bootable grub2 image'.
-
Hopefully the topic of this post makes sense. When using Build mode, I assume that ImgBurn has to actually build a temporary image file that is located somewhere on disk and is then burned to CD/DVD. My question is: where are these temporary image files created? I am using Vista build 5536 and I am experiencing severe system slowdown during a build-and-burn process. I suspect that the "Search Indexer" which is always running in the background is attempting to index the location of the temporary files, thus slowing everything down. If I know where these files are created, I can exclude the location from the indexer. Anyone have any ideas? I looked in all the preferences and couldn't find an option to specify any temporary file location. Thanks.
-
Once you create a boot image from a CD using Create Boot Image, then when you load that file under Boot Image, how are we supposed to determine the Emulation Type to use based on that image file? Or based on the CD? Trial and error might work, except for the Custom part. Thanks!
-
Hi Lightning Would appreciate if you could create a feature whereby IMGBURN can automatically create the VIDEO_TS.IFO and VIDEO_TS.BUP files after a movie titleset has been imported into BUILD. After this the image can then be constructed for burning. Currently I dont see a way that IMGBURN can create an image without these files also been in the folder concerned.
-
I was wondering if at some point in the future we might have a create folder option for the Build mode? I realize that may not be something to be offered until, and if, there ever is a "GUI" based implementation for Build mode, e.g. such as Nero. But, in Build's current configuration, I was thinking something that could be done was a create and then navigating into that folder as the windows main view. Then, Browse for a file works the same way. Or, use a + type of tree display, highlight a folder that is created, then any actions such as create further folders, add further files, etc. are added into that highlighted folder.
-
 Here is the screnshot mounted is an iso of a linux distro and here the verify that shows that imgburn actually sees both dvds. thanks
 -
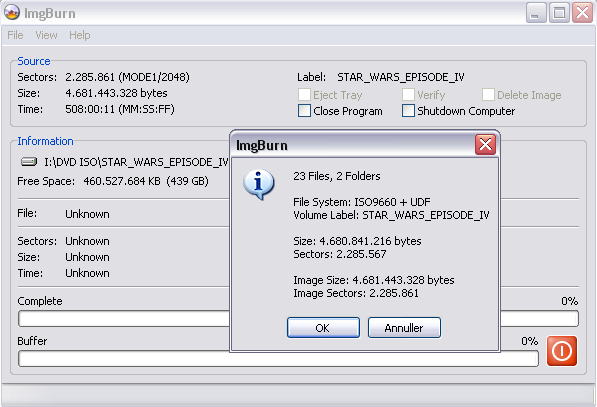
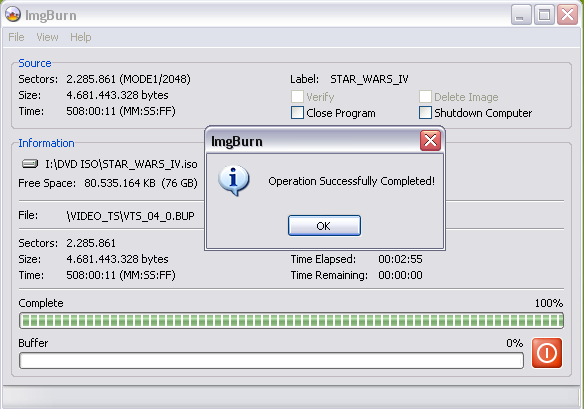
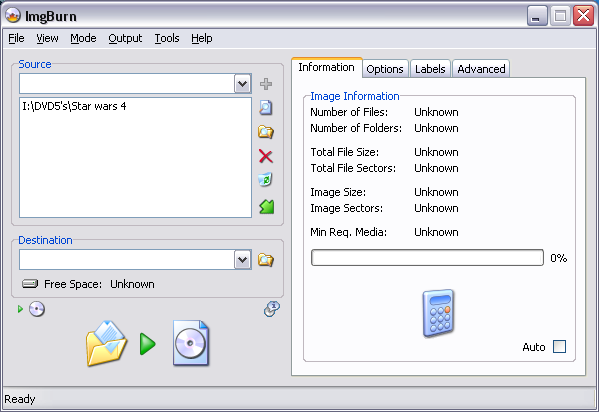
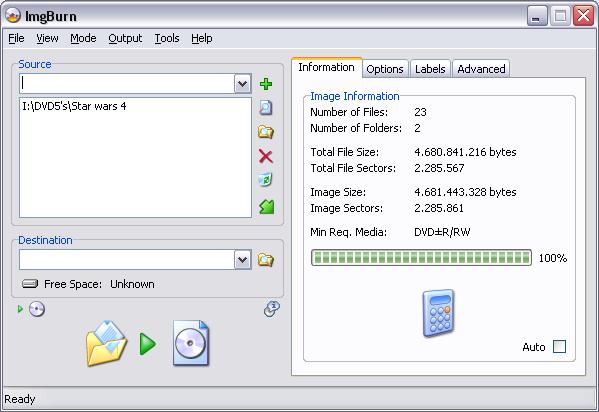
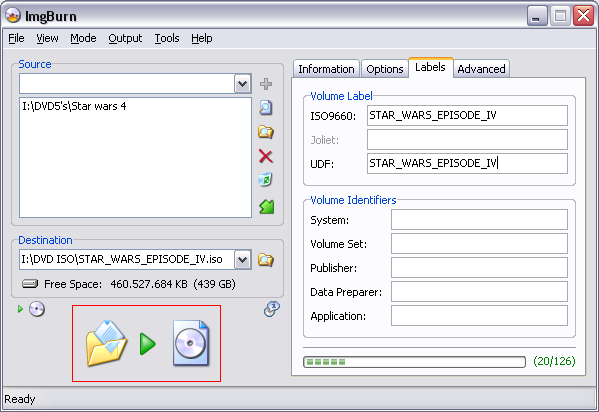
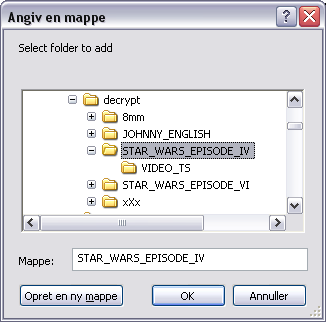
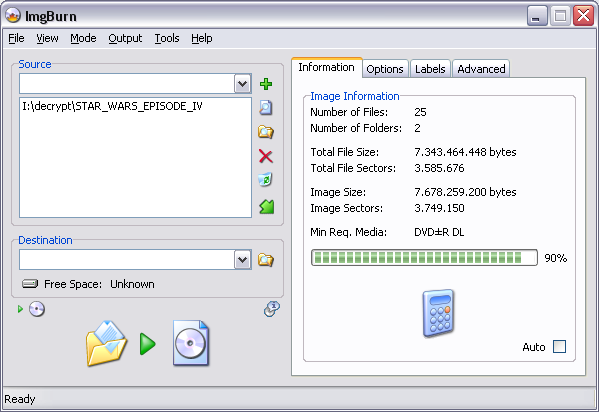
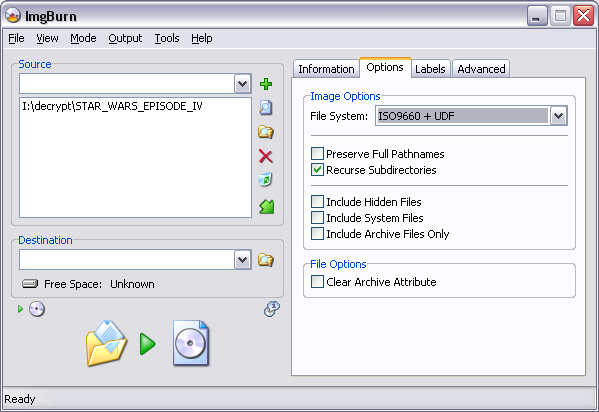
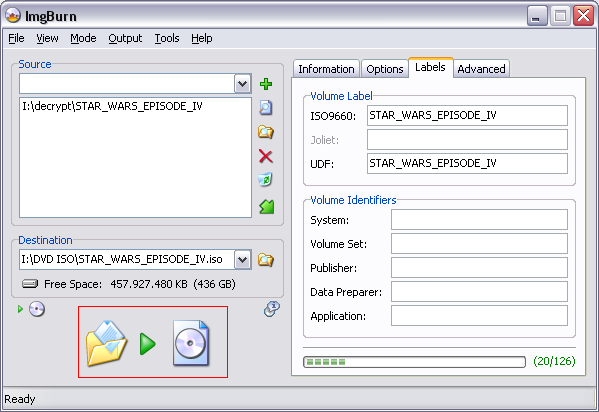
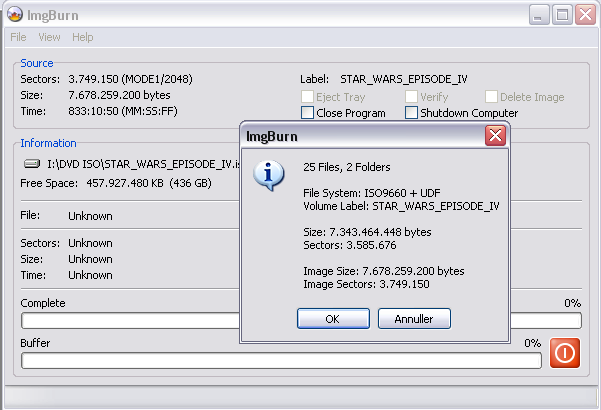
This will cover making a Single Layer ISO on your Hard Drive. Firstly make sure your Vob, Ifo and Bup files are in a folder called VIDEO_TS Next, open ImgBurn in Build Mode (Click 'Mode' -> 'Build') and switch the Output Mode to Image File (Click 'Output' -> 'Image File'). Click the 'Browse for a folder...' button in the source box, and navigate to the folder where you saved the files. When you have chosen the folder you require you can use the Calculator button to see if it will fit on the disc. At this point go to the 'Options' tab, and ensure ISO9660 + UDF is selected in the 'File System' drop down box. You should also configure the other options as you see them here in the screenshot. Next choose the 'Labels' tab and enter a nice name for your movie in both fields. This will be the 'volume label' of the disc once you've burnt it - it's what will be visible in 'My Computer' when you put the disc in your DVD drive. Now you need to enter the file name for your image file in the 'Destination' box. In this example, we use 'I:\DVD ISO\STAR_WARS_EPISODE_IV.iso'. You can enter it manually or click the 'Browse for a file...' button. When you've done that, press the Build Button. (Highlighted in the red box) You will then see the screen below: Press 'OK' and ImgBurn will start building your ISO. Then just wait a few minutes (system dependent) and your ISO and MDS (NB: MDS file is now optional for single layer discs) will be ready.


-
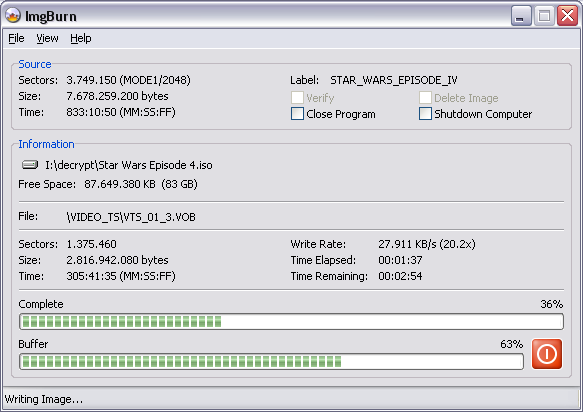
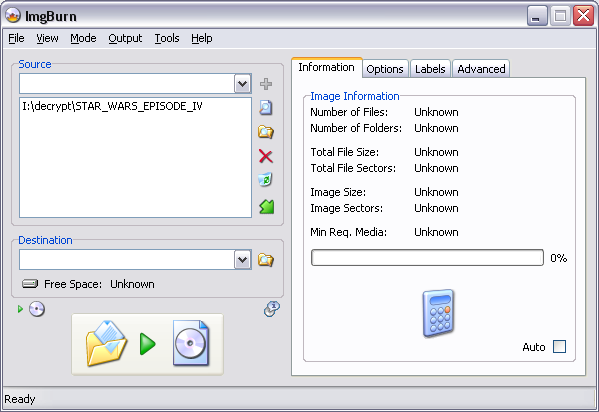
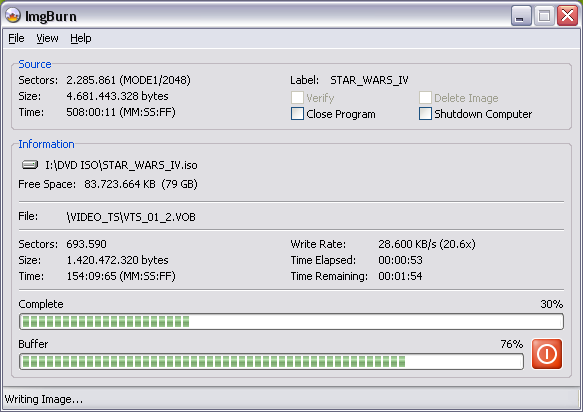
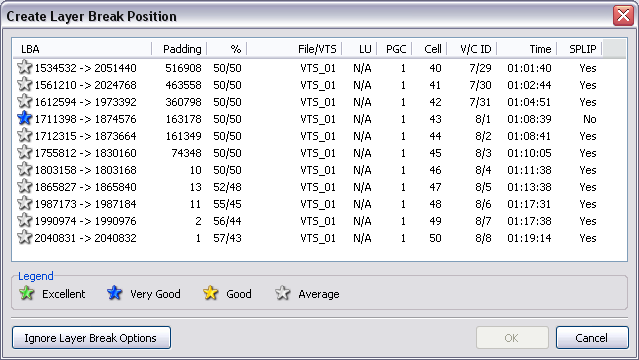
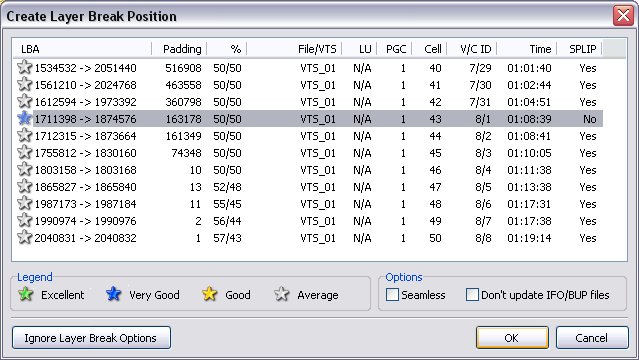
This will cover making a Dual Layer ISO on your Hard Drive. Firstly make sure your Vob, Ifo and Bup files are in a folder called VIDEO_TS then open ImgBurn in Build Mode and choose the folder option in the source box, and navigate to the folder you stored the files. When you have chosen the folder you require it should look like the picture above. Then press the Calculator and you will see a similar window to this, where you should choose the layer break. The best option here is the one on the right that says 'No' in the SPLIP column. Then press 'Ok'. The Legend at the bottom also indicates the best choices. At this point go to the options tab, choose ISO9660+UDF Next go to Labels and enter the name of your ISO in both fields. Next go to Advanced -> Media and ensure you have selected the appropriate profiles for the media you're intending to write to. If the estimated size of the image exceeds that specified in the 'Single Layer' -> 'Maximum Sectors' box, the program will know you're building a double layer ISO and configure itself accordingly. This is where the 'Double Layer' profile then comes in. If you do not select the correct profile you may have problems with the layer break when you burn the ISO file. Next choose your destination, and press the Build Button (Highlighted in the red box). The Layer Break choice window will appear again at this point. Normally you shouldn't worry about ticking the 'Don't update IFO/BUP files' box, and you should definintely not tick it unless you have prepared IFO's in advance containing layer break info. Press 'Ok'. You will then see this window. Press 'Ok' and the programme will start building. Then just wait a few minutes (system dependent) and your ISO and MDS will be ready. Remember to choose the MDS file when you eventually burn this ISO as it contains the layer break information.


-
Hi Lightning/BTM's, Have you ever thought of incorporating an ISO create mode. No decryption involved, simply an image creator like Coujo's ImgTool Classic? If asked before, my apologies. Mig$y
-
I'm having trouble trying to figure out how to create an image from a DVD.
-
 Hello again all, My quest for excellence in the DVD world continues....basically I'm trying to change a 16:9 widescreen DVD rip to 4:3 (checked the DVD only 16:9 aspect-no option for 4:3) (older tv & I prefer 4:3) by using DixxtoDVD (free version) & changing the aspect to 'force 4:3'. Firstly I rip all files (file mode to their own esktop folder) to a folder, open folder, highlight all files, click 'open' which puts all the files (all VOB, 5 files in total) in to DixxtoDVD, hit 'convert', says 25 minutes. Happily carries on, gets to last 5 seconds & suddenly the 5 seconds is shown as a semi complete green progress 'bar' & goes VERY slowly. The programme is still encoding/analysing at the same speed but the progress bar is VERY slow & stuck on 5 seconds (all be it moving very slowly). Gave up as it had taken 1 1/2 hours (got 640 odd MB on system & 20 GB hard drive). My aim was to then convert to an image with IMAGETOOL & re-burn using decrpter/imageburn to DVD & hey presto, 4:3 aspect!! 2 questions....A)-Am I doing this completely wrong....??! -Or will it take loads of time & will work-leave overnight?? Thanks again! Chris
 -
hello, often I find myself at remote location (client, etc) and needing to make a backup of a CD or DVD (data-- not movies). ImgBurn is of course my favorite choice for reliable freeware burner app but what to use for creating said ISO image? Yes of course Nero, Alcohol120, etc can be used but these require lengthy installations and registration and I am charging client by the hour cannot waste too much time downloading etc. What do you all use for quick easy ISO creations that can be carried on USB key for example? One such program I found is called LCISOCreator. It is very simple, plain GUI but it works OK -- but sometimes gives me strange errors / crashes. So I look for something perhaps a bit more reliable? Of course it would be great if ImgBurn could add this ability inside itself but I have seen others ask for this and the idea gets shot down (not sure why, but I wont open can of worms again) so if you have any recommendations I would really appreciate it!! PS yes I know DVD Decrypter can create ISO images but it only works for DVDs not CD-ROMs! edit: I found 2 more utilities, that may be of use: burnatonce 0.99b Folder2Iso v1.1 if anyone knows of any others please let me know!