Adrianvdh
-
Posts
675 -
Joined
-
Last visited
Content Type
Profiles
Forums
Events
Everything posted by Adrianvdh
-
the ability to re author a disc image ... similar the DVD shrink but no shrinking
-
ImgBurn Drive USB... Dont tase me again?..
Adrianvdh replied to Adrianvdh's topic in ImgBurn Suggestions
Thanks Yes Finally -
You select the file to auto run and the icon
-
The ability to make ImgBurn (build mode) to have a check box to make a build image/disc auto run the files on the image or disc
-
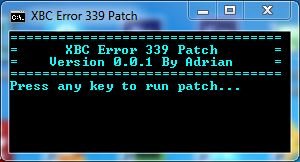
Ok fine here is the version of it that register's it v0.0.2: http://205.196.121.137/81235ou937ig/97vnjn8ej3hvo7t/XBC+Error+339+Patch.zip
-
it doesn't need to
-
IMGBurn Burns and Verifies 100% (Cheap media)
Adrianvdh replied to DarylJones92's topic in ImgBurn Support
Did you Overburn or Truncate -
I don't know if your being rood or nice?
-
Ahh screw it I just made a batch file to do it for me and other people with this problem... "PIMP me if you wish"... Oh you need the rights to run this program... http://forum.imgburn.com/index.php?app=core&module=attach§ion=attach&attach_id=10615
-
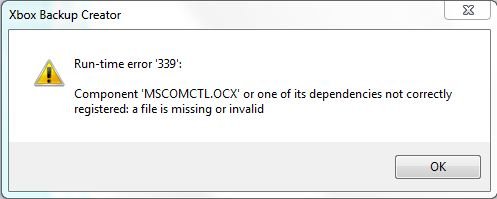
I still get the error
-
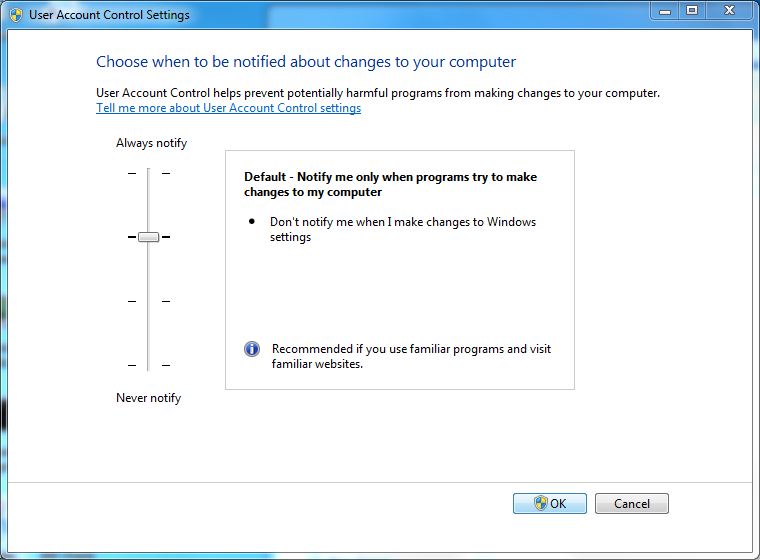
No it gives me an error what is UAC i know a little of it that its the privileges for a program to run but i don't fully understand it. Ok which one do I select:

-
Hi can someone help me with a run time error from xbox backup creator ... I have already done the steps here: http://majorgeeks.com/faqshow.php?id=8?
-
Ok Ok I wont bother you then
-
Why not your own file system a commands running down: READ SPEED=x8 blablabla etc something.whatever No could you help with the win7 post at #6
-
Im just asking with these commands because iv never had to deal with a program the implemented cmd ... why batch why not vbs for these commands ... they dont belong in batch they are your own script that is why i need help with them ... Yes just a little say I'm advansted with batch file .. no one can 'master' a lan
-
Its just hard expressing myself on other stuff as well i dont know and yes my lan is English and only English thats all i know
-
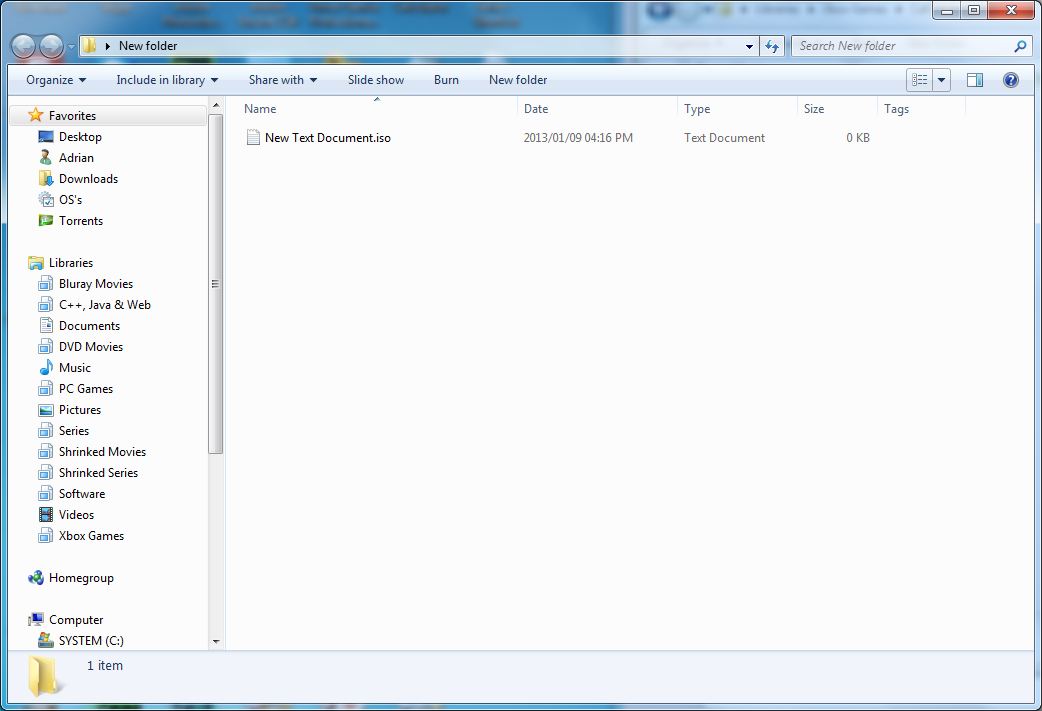
Oh and another topic in windows 7 you get the option to change to file extension by creating a random file such as a .txt from a .iso for example no I dont have that how do i get it ... and no it just adds the .iso to the file name

-
Yes I know what batch files are I have told you this? I just want to know (sorry for changing this) is there an order of the commands, how many commands do i need and what commands do i need for ImgBurn to work successfully
-
ahh its hard expressing stuff to you...
-
Ah I know what parameters are I just want to know how to aplpy the 'command' you made for ImgBurn fo batch file... ( in the readme.txt it looks weird) ok so for an example i would just make shuffled the commands if i want? Why I'm asking all this is I want to make a batch file where there are options to select and then i make to options and prints it into a batch file and then run it
-
Sorry for asking this but I'm puzzled how the hell do I use this in a batch file... /MODE <PICKER | READ | BUILD | WRITE | VERIFY | DISCOVERY> Used to tell the program which 'Mode' to open up in. /BUILDINPUTMODE <STANDARD | ADVANCED> Used to tell the program which 'Build Input Mode' to open up in. Only applies to BUILD mode. /BUILDOUTPUTMODE <DEVICE | IMAGEFILE> Used to tell the program which 'Build Output Mode' to open up in. Only applies to BUILD mode. /SRC <Drive Letter | SCSI Address> | "<Folder Name>\" | "<File Name>" | ALLSECTORS | <Custom Number Of Sectors> Used to select the source drive or filename. Drive Letter or SCSI Address applies to READ and VERIFY modes. Folder Name applies to BUILD mode. File Name applies to BUILD and WRITE modes. ALLSECTORS applies to DISCOVERY mode. Custom Number Of Sectors applies to DISCOVERY mode. Examples: /SRC J: /SRC 1:0:0 /SRC "C:\DVD_FILES\VIDEO_TS\" /SRC "C:\DVDIMAGE.ISO" /SRC "C:\BackupProject.IBB" /SRC ALLSECTORS /SRC 2295000 In BUILD mode, you can specify an '.IBB' file as the source. This is an 'ImgBurn Backup Project' file and is a simple text file containing the names of folders / files to add to the image, along with the various configuration options. The simplest way to find the correct syntax for an '.IBB' file is to have ImgBurn create one via the 'Save Project...' option in the 'File' menu, and then look at it in notepad. In BUILD mode, you can specify multiple folders / files directly if you put a pipe character ('|') between them. Example: /SRC "C:\Folder1\|C:\Folder2\|C:\Document1.txt|C:\Document2.txt" /SRCLIST "<File Name>" Used to specify a text file that represents a basic list of folders / files to be added to the 'Source' box. Only applies to BUILD mode. Example: /SRCLIST "C:\BackupList.txt" /DEST <Drive Letter | SCSI Address> | "<File Name>" Used to select the filename or drive. Drive Letter or SCSI Address applies to BUILD, WRITE and DISCOVERY modes. File Name applies to READ, BUILD and VERIFY modes ('DEST' actually means 'Compare' here for VERIFY mode). Examples: /DEST J: /DEST 1:0:0 /DEST "C:\DVDIMAGE.ISO" When in READ mode, you can use '[DISC_LABEL]' | '[DATETIME]' | '[DATE]' | '[TIME]' (without quotes) anywhere in the file name specified with this switch, and the program will replace it with the appropriate value. When in BUILD mode, you can use '[DATETIME]' | '[DATE]' | '[TIME]' (without quotes) anywhere in the file name specified with this switch, and the program will replace it with the appropriate value. Examples: /DEST "C:\DVDIMAGES\[DISC_LABEL].ISO" /DEST "C:\DVDIMAGES\DailyBackup_[DATETIME].ISO" /FILESYSTEM "<File System>" Used to change the value of the 'File System' drop down list. Only applies to BUILD mode. The parameter must match the value within the drop down list exactly. Examples: /FILESYSTEM "ISO9660" /FILESYSTEM "ISO9660 + Joliet" /FILESYSTEM "ISO9660 + UDF" /UDFREVISION "<UDF Revision>" Used to change the value of the 'UDF Revision' drop down list. Only applies to BUILD mode. The parameter must match the value within the drop down list exactly. Examples: /UDFREVISION "1.02" /UDFREVISION "2.50" /VOLUMELABEL "<Volume Label>" Used to set the value of the volume label fields. Only applies to BUILD mode. Length limits are automatically applied. i.e. 32 chars for ISO9660, 16 for Joliet, 126 for UDF. To specify different volume labels for each file system, the following switches are also available: /VOLUMELABEL_ISO9660 "<Volume Label>" /VOLUMELABEL_JOLIET "<Volume Label>" /VOLUMELABEL_UDF "<Volume Label>" These will override what's been set (if anything) by the '/VOLUMELABEL' switch. /SPEED <Write Speed> Used to change the value of the 'Write Speed' drop down list. The parameter must match the value within the drop down list exactly. Examples: /SPEED MAX /SPEED 1x /SPEED 2.4x (or 2,4x depending on regional settings) /COPIES <Number Of Copies> Used to change the value of the 'Copies' drop down list. The parameter must match the value within the drop down list exactly. Only applies to WRITE mode. Example: /COPIES 2 /LAYERBREAK <LBA> Used to tell the program where to put the layerbreak. Only applies to WRITE and DISCOVERY modes and only when burning DVD+R DL discs. Example: /LAYERBREAK 2000000 /ERASE Used to automatically erase / format / overwrite media. /OVERWRITE <YES | NO> Used to force the program to either overwrite all existing files, or never overwrite them. /TESTMODE <YES | NO> Used to make the program simulate the burn - whereby no data is actually written to the disc. Basically, it just checks (or unchecks!) the 'Test Mode' box for you! /VERIFY <YES | NO> Used to make the program verify a disc is readable after it has been burnt. Basically, it just checks (or unchecks!) the 'Verify after write' box for you! /DELETEIMAGE <YES | NO> Used to make the program delete the image after it has been burnt. Basically, it just checks (or unchecks!) the 'Delete Image When Done' box for you! /DELETESOURCE <YES | NO> Used to make the program delete the source files after they've been burnt. Only applies to BUILD mode. *** USE WITH CAUTION *** /EJECT <YES | NO> Used to make the program eject the disc after it has been burnt. Basically, it just checks (or unchecks!) the 'Eject Tray When Done' box for you! /START Used to start the burn process automatically when the program has finished initialising. Basically, it just presses the 'Build' / 'Write' / 'Verify' button for you! /CLOSE Used to close the program when the burn process has finished. Basically, it just presses the 'Close' button for you! /CLOSEINFO Used to close the program when the text file specified by '/INFO' has been created. Basically, it just presses the 'Close' button for you! /CLOSESUCCESS Used to close the program when the burn process has finished AND was successful. Basically, it just presses the 'Close' button for you! /SHUTDOWN Used to shutdown the computer when the program has finished burning. Basically, it just checks the 'Shutdown computer when done' box for you! /WAITFORMEDIA Used in combination with /START and /CLOSE to wait until the program is 'Ready' to burn before trying to start. Normally, if the program isn't 'Ready', the /CLOSE switch causes the program to close without having done anything. /IGNORELOCKVOLUME Used to make the program ignore any 'Access is denied' errors it might run into when it tries to lock the drive for exclusive access, meaning the burn can continue without user intervention. This is mainly for 3rd party applications that are unable to release any 'handles' that they might have open to the drive - thus preventing ImgBurn from obtaining the lock. /NOIMAGEDETAILS Used to stop the program from displaying details about the image. Only applies to BUILD mode. /ROOTFOLDER <YES | NO> Used to automate the 'Root Folder' prompt you get when only adding a single folder to the source list. Only applies to BUILD mode. /BDMVFOLDERS <YES | NO> Used to override the 'Create BDMV Folders' option in the settings. Only applies to BUILD mode. /CERTIFICATEFOLDER <YES | NO> Used to automate the 'Certificate Folder' prompt you get when a 'CERTIFICATE' folder is present at the same directory level as the BDAV/BDMV folder but hasn't been included. It will also override the 'Create CERTIFICATE Folder' option in the settings. Only applies to BUILD mode. /PRESERVEFULLPATHNAMES <YES | NO> Basically, it just checks (or unchecks!) the 'Preserve Full Pathnames' box for you! Only applies to BUILD mode. /RECURSESUBDIRECTORIES <YES | NO> Basically, it just checks (or unchecks!) the 'Recurse Subdirectories' box for you! Only applies to BUILD mode. /INCLUDEHIDDENFILES <YES | NO> Basically, it just checks (or unchecks!) the 'Include Hidden Files' box for you! Only applies to BUILD mode. /INCLUDESYSTEMFILES <YES | NO> Basically, it just checks (or unchecks!) the 'Include System Files' box for you! Only applies to BUILD mode. /INCLUDEARCHIVEFILESONLY <YES | NO> Basically, it just checks (or unchecks!) the 'Include Archive Files Only' box for you! Only applies to BUILD mode. /CLEARARCHIVEATTRIBUTE <YES | NO> Basically, it just checks (or unchecks!) the 'Clear Archive Attribute' box for you! Only applies to BUILD mode. /FILESYSTEMONLY Used to make the program create an image with nothing but the file system in it - i.e. no actual file data (or anything that would normally come after the file data). The image will be useless for anything except looking at the file system layout, you have been warned! Only applies to BUILD mode. *** USE WITH CAUTION *** /OPTIMISEDUPLICATEFILES Used to make the program detect duplicate files within your compilation and only store the data for those files once - thus saving disc space. Only applies to BUILD mode. /BOOTEMUTYPE <0 | 1 | 2 | 3 | 4> Basically, it just modifies the 'Emulation Type' field on the 'Advanced' -> 'Bootable Disc' tab for you! Only applies to BUILD mode. 0 = None (Custom) 1 = Floppy Disk (1.20 MB) 2 = Floppy Disk (1.44 MB) 3 = Floppy Disk (2.88 MB) 4 = Hard Disk Example: /BOOTEMUTYPE 0 /BOOTIMAGE "<File Name>" Basically, it just modifies the 'Boot Image' field on the 'Advanced' -> 'Bootable Disc' tab for you! Only applies when the '/BOOTEMUTYPE' switch is also specified. Only applies to BUILD mode. Example: /BOOTIMAGE "C:\BootImage.ima" /BOOTDEVELOPERID "<Developer ID>" Basically, it just modifies the 'Developer ID' field on the 'Advanced' -> 'Bootable Disc' tab for you! Only applies when the '/BOOTEMUTYPE' switch is also specified. Only applies to BUILD mode. Example: /BOOTDEVELOPERID "LIGHTNING UK!" /BOOTLOADSEGMENT <Load Segment> Basically, it just modifies the 'Load Segment' field on the 'Advanced' -> 'Bootable Disc' tab for you! Only applies when the '/BOOTEMUTYPE' switch is also specified. Only applies to BUILD mode. "Load Segment" should be specified as 4 digit/character hexadecimal value. Example: /BOOTLOADSEGMENT 07C0 /BOOTSECTORSTOLOAD <Sectors To Load> Basically, it just modifies the 'Sectors To Load' field on the 'Advanced' -> 'Bootable Disc' tab for you! Only applies when the '/BOOTEMUTYPE' switch is also specified. Only applies to BUILD mode. Example: /BOOTSECTORSTOLOAD 4 /BOOTPATCHBOOTINFOTABLE Basically, it just checks the 'Patch Boot Information Table' box on the 'Advanced' -> 'Bootable Disc' tab for you! Only applies when the '/BOOTEMUTYPE' switch is also specified. Only applies to BUILD mode. /IBG "<File Name>" Used to make the program write the graph data to a file of the specified name after burning (or verifying if it's enabled). /LOG "<File Name>" Used to make the program write the log to a file of the specified name when closing down. You can use '[DATETIME]' | '[DATE]' | '[TIME]' (without quotes) anywhere in the file name specified with this switch, and the program will replace it with the appropriate value. Example: /LOG "C:\ImgBurn Logs\DailyBackup_[DATETIME].log" /LOGAPPEND When used in combination with '/LOG "<File Name>"', it will make the program try and append to the file rather than overwrite it. /LOGHEADER When used in combination with '/LOG "<File Name>"', it will make the program add a header to the log showing the program version, date and time. It is recommended that this switch be used when creating a new log file that you will later append to via use of the '/LOGAPPEND' switch. The same header is automatically added when using the '/LOGAPPEND' switch so this switch need not be specified. /NOSAVELOG Used to tell the program not to save the log when it's closed. /INFO "<File Name>" Used to make the program write the contents of the drive/media information window (on the right side of the main window) to a file of the specified name after full initialising the media. /PORTABLE Used to make the program skip the sections where it would normally write file association / autoplay / shell extension data to the registry. When used in combination with '/SETTINGS "<File Name>"', you can make it so ImgBurn doesn't make any changes to the PC it's being run on. This is useful if you're running it from a USB pen etc. /LANGID <Language Identifier> Used to tell the program which language to start up in. Values can be in decimal or hexadecimal formats. The appropriate '*.lng' file must exist in the 'Languages' folder. Example: /LANGID 0x0809 /LANGID 2057 Both of the above will cause the program to start with the GUI interface in the 'English (United Kingdom)' language. /SETTINGS "<File Name>" Used to override loading the settings from the registry, and instead load from / save to the specified file. If the file does not exist, default settings will be used and the program will attempt to save to the specified file when it's closed. Even if this switch is not specified, the program will attempt to load from 'ImgBurn.ini' in the application exe's directory BEFORE it loads from the registry. /NOSAVESETTINGS Used to tell the program not to save ANY settings when it's closed. All these command can you please have a full tutorial and examples with it...
-
-
Sorry i don't understand
-
How it Works ----------------- Load your favorite burning software. Insert your blank DVD+R DL disc. Send the BurnerMAX Payload. Re-select your drive in the burner software and the capacity will be increased. You will need to send the BurnerMAX Payload evertime you insert a blank DVD+R DL disc. Special vendor specific commands are sent to examine in realtime the drives custom registers, searching for specific DVD+R DL blank media capacity and layer capacity parameters. If found these registers are modified using another set of vendor specific commands. Due to the use of stock firmware and different burner makes and models, any settings the burner has play a more important role. For iHas burners B, C and D, recommended settings are: Force Hypertuning - Enabled Online Hypertung - Disabled Smartburn - Enabled Overspeed - Enabled OPC history - Do not clear Results may vary depending on hardware and disc brand. Verbatim DVD+R DL (Singapore Manufactured) Blank Discs are recommended for best results. I would like to wish everyone a merry xmas and a happy new year - many more goodies are coming...... Thanks go to Team Jungle for their hard work and efforts in the development process. Thanks also go to Team Xecuter for their support to this project. I wish to dedicate BurnerMAX Payload Tool's release to the victims of the Connecticut school massacre and the bravery of the school teachers involved who saved many lives. Changelog -------------- v0.15 - First release
-
oh can you post a topic then please