LIGHTNING UK!
-
Posts
30,523 -
Joined
-
Last visited
Content Type
Profiles
Forums
Events
Everything posted by LIGHTNING UK!
-
Next time that 'not enough space' box comes up, press CTRL+C and it'll copy the text on it to your clipboard, then CTRL+V (paste) it into your reply. It doesn't make sense that the info on the right says there's 700mb free and yet you're still getting the warning from a 540mb image.
-
You need the bootimage off the original, just add it (and the other info) on the 'Bootable Disc' tab (which is a sub-tab of the 'Advanced' one). In fact, if you search the forum I'm pretty sure someone's done this and explained what's required.
-
The errors come from the drive so the software shouldn't even come into it. The drive is simply reporting that it's having trouble writing to the media (hence the 'Write Error' error code) so really it should be some issue between the drive, firmware and the media itself.
-
You realise that test mode doesn't actually write anything on the disc yeah? If you're burning 500mb, there would be no problem with that media, the program clearly knows there's 700mb free space.
-
Try the drive in another PC too if you can. If you're saying a disc from a different spindle of discs worked ok, maybe you just got a bad batch?
-
Why does imbburn suggest layer break with clonecd iso?
LIGHTNING UK! replied to lpew's topic in ImgBurn Support
An ISO has no concept of a layer break. That's the whole point in the .DVD or .MDS files - they are the files that contain this info. Without them the DL ISO is just a big SL image. -
Test mode doesn't actually burn anything - hence it's not a test of if the drive can write to the disc or not. What I'd probably do here is try changing the 'Write Type' to Incremental as some picky drives that aren't quite 100% will sometimes respond to one write type better than the other. You could also try cleaning the drive if you've not already done so.
-
Try cleaning the drive, that's about all you can do if you're already using the best/latest of everything.
-
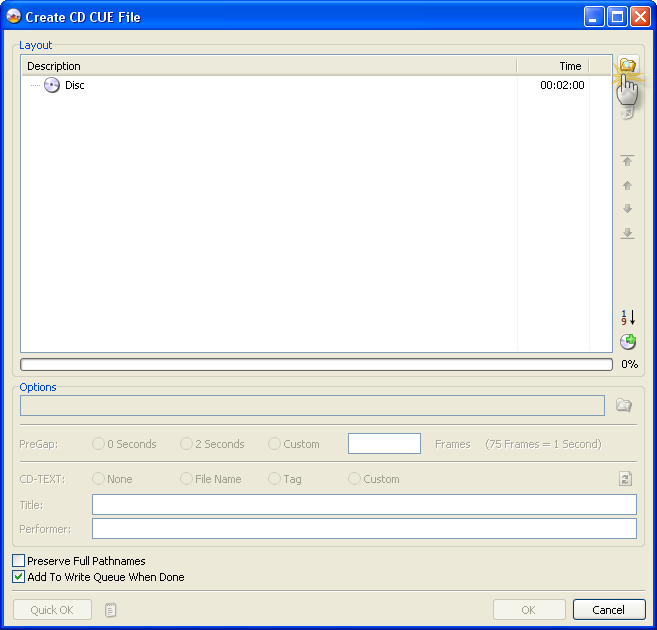
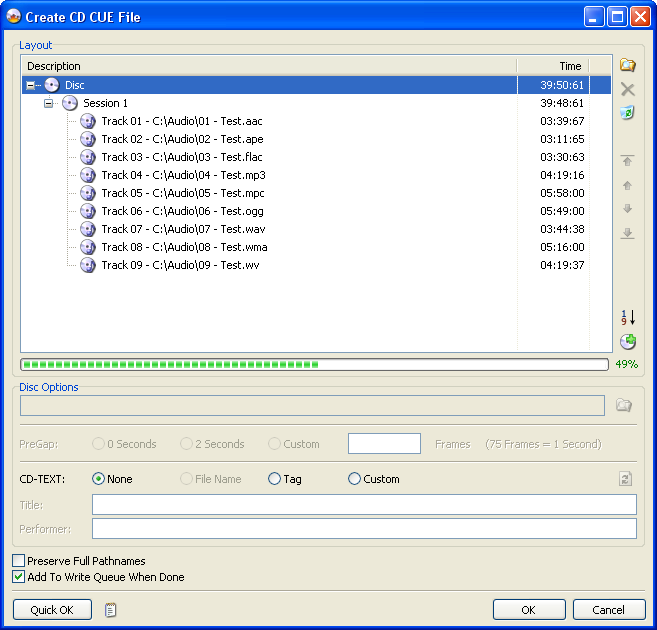
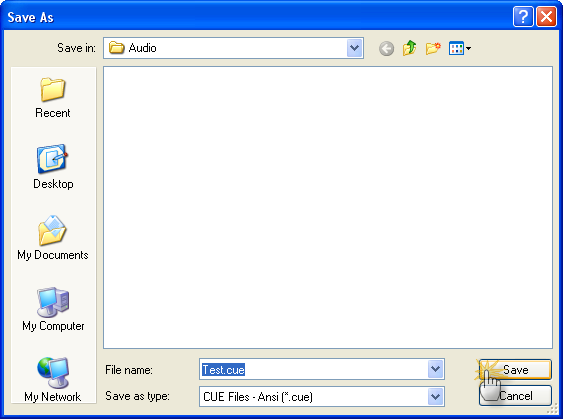
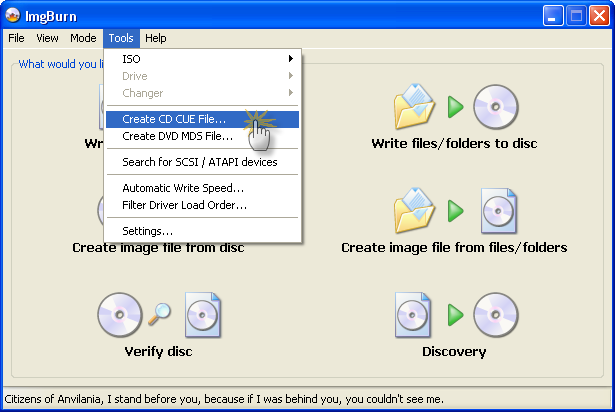
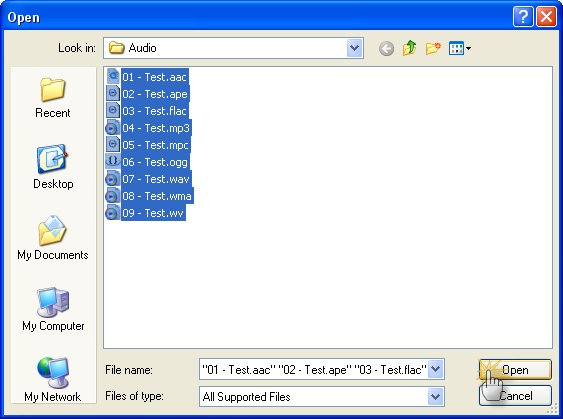
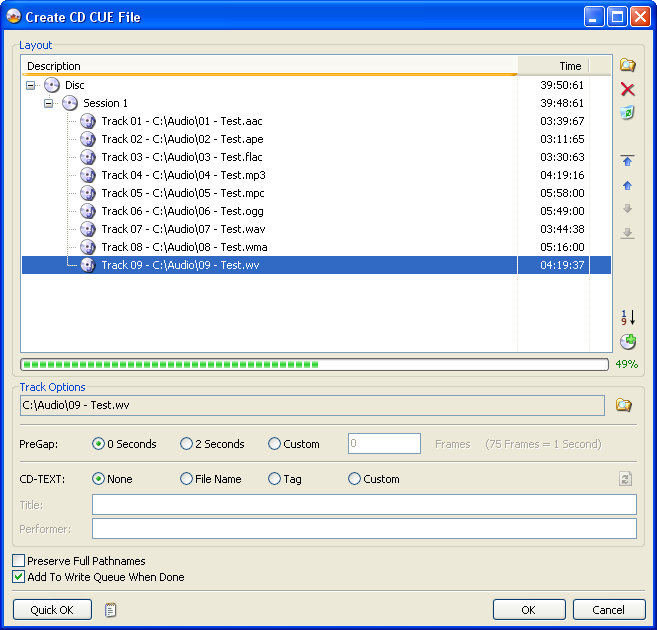
NOTE: This Guide only applies to ImgBurn 2.4.0.0+ and is for burning a *proper* Audio CD (typically 80 minutes worth of audio) that's playable in any standalone CD player. If you want to burn MP3 files for playback in an MP3 ready CD player, just add the files in Build mode and ignore this guide. ImgBurn's ability to burn Audio CD's is currently based around the well known 'CUE' (as in 'BIN + CUE') image file format. To burn music files (MP3 etc) you first need to create a CUE file. Top Tip: If you already have a CUE file you should be following this guide instead - http://forum.imgburn.com/index.php?showtopic=61 The most direct method of doing this involves first switching to 'Write' mode. To do this, click the 'Mode' menu at the top and then click 'Write'. Then click the 'Create CUE File...' button. Top Tip: This is probably the easiest way, especially if you intend on burning the disc there and then. OR you can do it by clicking the 'Tools' menu and then selecting 'Create CUE File'. You'll then be presented with the screen shown below. Next, click on the top right 'Browse for a file...' button. The familiar 'Open File' dialog box will then appear. When you've located your files and selected them, just click the 'OK' button. Top Tip: You can also just use drag and drop from an Explorer type window. Once you've added your files the window should look something like this... If you want to configure the 'PreGap' / 'CD-TEXT' options for your tracks, select each track in turn and change the settings until your heart is content! Note: ImgBurn currently supports reading 'Tag' data from APE, Flac, MP3, OGG, WMA and WV files. Note 2: Whilst most standalone CD players support reading CD-TEXT from a CD, software players do not (they rely on an Internet database). You can use a plug-in called 'WMPCDText' to get Windows Media Player reading CD-TEXT from the disc properly. Alternatively if you want to do them all in one go, highlight the appropriate 'Session' object in the tree and do it that way. Along the same lines, highlight the 'Disc' object in the tree if you want to configure the top level 'CD-TEXT' information - this is where you'd specify the album name/title (as opposed to the track name/title). Depending on how you like to work, you might want to check the 'Add To Write Queue When Done' box here. By doing so, you won't then have to load it manually when you've switched to 'Write' mode and are ready to burn. When you're done, click the 'OK' button and you'll be prompted to save your new CUE file. Type in a name for the file and click 'Save'. If you took the easy route earlier (via the button in 'Write' mode), you can probably just click the big 'Write' button to burn your audio compliation to disc! OR you can simply follow the 'How to write an image file to a disc with ImgBurn' guide to burn your new CUE file just like any other image file.


-
Besides the log, I'd also like you to copy + paste the info from the panel on the right of the main screen when you've got one of these problem blank CD's in the drive.
-
What File system-both VIDEO_TS folder & jpg files
LIGHTNING UK! replied to Oak Tree's topic in ImgBurn Support
When you add a single folder to the source list, ImgBurn will prompt you and ask if that folder represents what should be the root of the disc. So just say 'Yes'. Then all you'll have on the disc is the 'Pictures' and 'VIDEO_TS' folder... the 'MY_DVD' one won't actually be on there (just everything that lives within it). -
What File system-both VIDEO_TS folder & jpg files
LIGHTNING UK! replied to Oak Tree's topic in ImgBurn Support
Make a folder structure like this... [some random folder path]\MY_DVD - (JPG files go in here) [some random folder path]\MY_DVD\VIDEO_TS - (IFO/BUP/VOB files go in here) or [some random folder path]\MY_DVD\Pictures - (JPG files go in here) [some random folder path]\MY_DVD\VIDEO_TS - (IFO/BUP/VOB files go in here) Then add the '[some random folder path]\MY_DVD' folder to the source list in Build mode. -
The real BenQ firmwares support loads of extra stuff that the philips one probably doesn't. For instance, you can now use the 'book type' / 'advanced settings' features. They're located in the Tools -> Drive menu.
-
A font manager?
-
lol keep splitting cells until you find one that works! The next version does make it a bit easier as it points you in the right direction as to which cell you should split. All I'd do at the moment is look at the entire VIDEO_TS folder and find the midway point - size wise - as a file. Then figure out where that point is in terms of positioning within the VTS set. Then just split some of the cells around that point.
-
I believe the functionality you're talking about is only possible with packet writing software or on formatted DVD-RAM. ImgBurn doesn't let you delete anything from a disc. Once you've burnt something, it's burnt forever and the disc is closed/finalised. You cannot turn off finalising, the option in the settings is for something else to do with finalising. I would actually advise you to NOT use DVD+RW as if it's a big floppy disc, use a memory stick or DVD-RAM disc instead.
-
Cannot find specified file when opening file..
LIGHTNING UK! replied to elacesar's topic in ImgBurn Support
look very closely at the path + name of the file it's opening, it wouldn't be saying it can't open a file unless it really can't! If you could get us a screenshot of the error that might help. OR press CTRL+C (copy) when the error box is on the screen (and active) and then CTRL+V (paste) into your next reply. -
You'll probably need to follow chewy's link above and convert to a BenQ 1620. Then you can use ImgBurn to make it booktype to DVD-ROM via the 'Book' icon down the bottom right of the main screen (in build mode it's on the 'Device' tab).
-
All you can do is try some decent MCC or YUDEN DVD+R discs and booktype to DVD-ROM. You might find they work better.
-
Do you have a note of the exact error it pops up?
-
Well then it's pretty simple. Just copy the contents from both dvds into a folder and make a new image from that folder. No idea if it'll actually work though - that's a chance you take. Also, some of the files might want to overwrite each other.
-
Problems with burning DL+R Media!
LIGHTNING UK! replied to JamieThompson90's topic in ImgBurn Support
Seagull, please create your own thread and when you do so, post a log of a failed burn so we can see what's going on. -
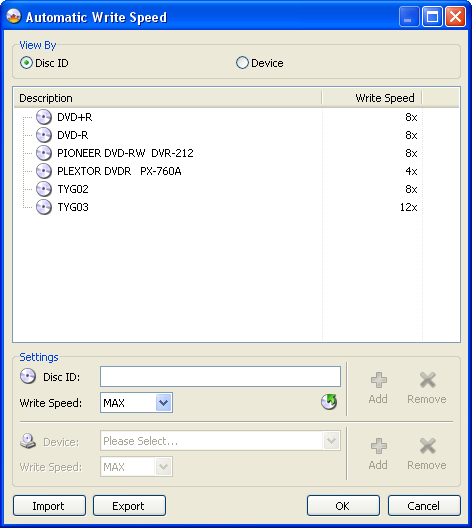
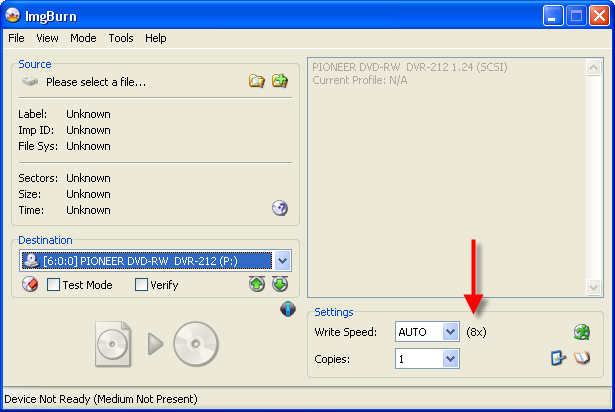
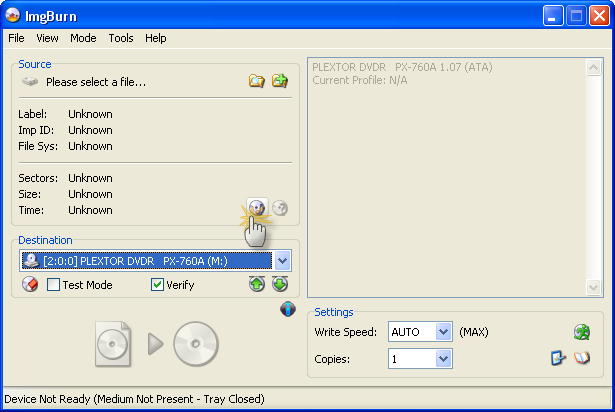
FYI, I've now added a fallback whereby if the 'Disc ID' isn't found in the list (and it's therefore about to default to 'MAX'), it'll go through each item and compare it to the drive name. So where before you could add things like: TYG02, 8x TYG03, 12x DVD+R, 8x DVD-R, 8x You can now extend that to include PLEXTOR DVDR PX-760A, 4x PIONEER DVD-RW DVR-212, 8x Then, as you can see, the AWS feature knows that you want to burn at 8x whenever the Pioneer drive is selected and the media you're using is not defined in the list.


-
You've got hard drive problems - or whatever drive E: is that you're trying to read from.
-
What model standalone do you have?