cornholio7
-
Posts
3,054 -
Joined
-
Last visited
Content Type
Profiles
Forums
Events
Everything posted by cornholio7
-
you can get VSOM from the link i posted in post #6. re-formatting is a bit drastic if everything else is ok. is it just these discs that show 2.4x max or is it the same with other discs?
-
that firmware worries me, try flashing to VSOM
-
did you delete and re-boot? windows lies about it
-
well if it has been burning fast with that firmware on it then you must have dma problems. look at this and be sure to delete your controller and re-boot
-
where did you find that firmware and how long have you had it installed?
-
where did you get that firmware? it looks nothing like the ones for your burner. check here http://forum.rpc1.org/dl_firmware.php?download_id=1818 when i had an 832 lite-on it was only rated as 8x check your firmware- see if it helps
-
its no bug . you should do some more research about how to back up dual layer,google is your friend ditch the ritek discs , they are crap and use only verbatim discs for dual layer
-
lfc was replying to groundrush
-
-
try updating your firmware to the latest if you haven't tried that already. does your drive support -r discs? can you post a log with one of the +r discs in the drive please
-
all i can say is it will be worth the wait
-
So " Boss" when do us mere mortals get our grubby mits on it.....? i think i can chip in here and say when its ready
-
well i only just managed to get my copy of R30 yesterday and havent seen it yet, ill look into the replay discs when i've had a chance to enjoy R30 . thanks pain man
-
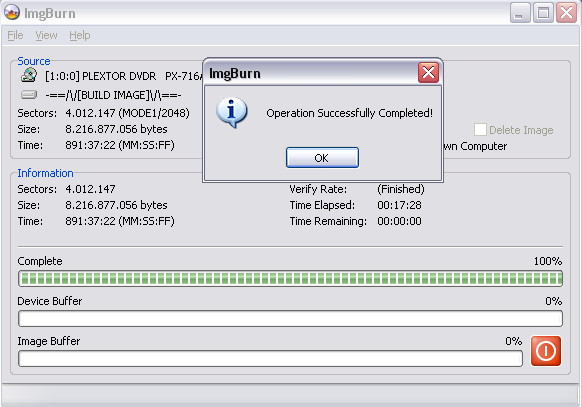
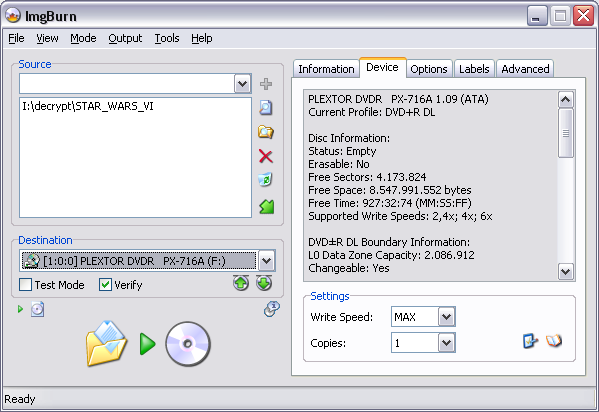
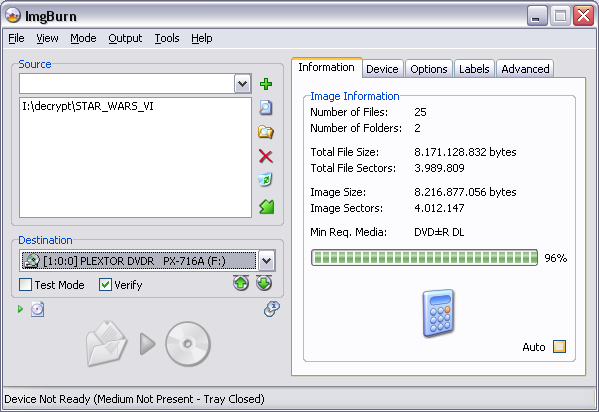
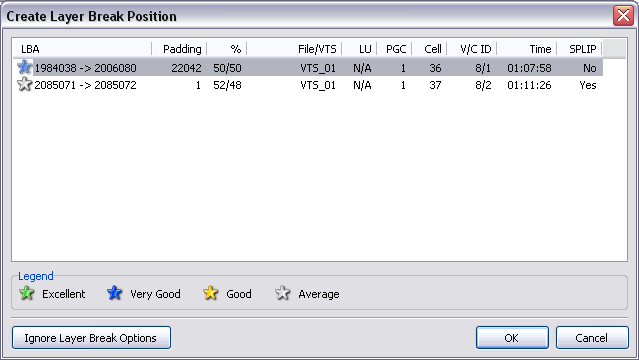
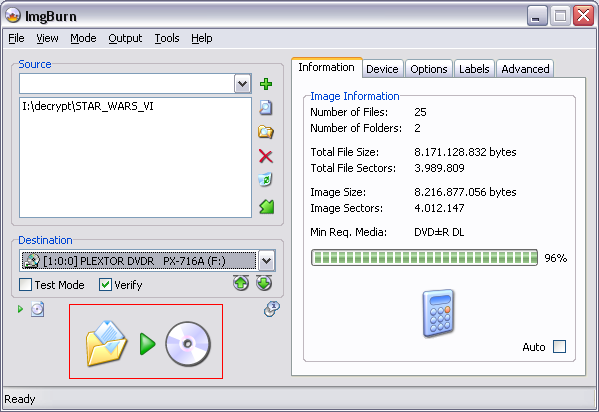
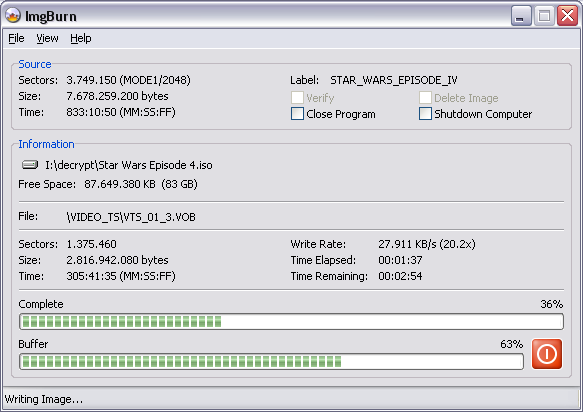
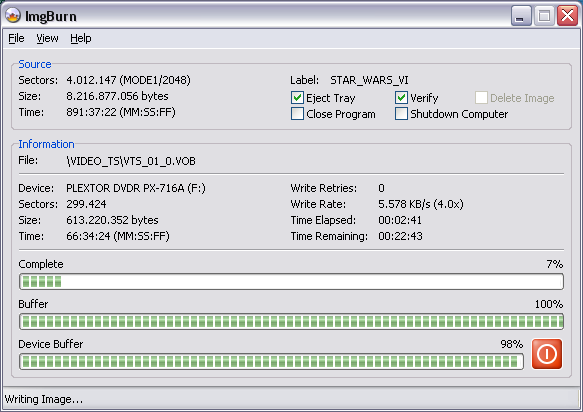
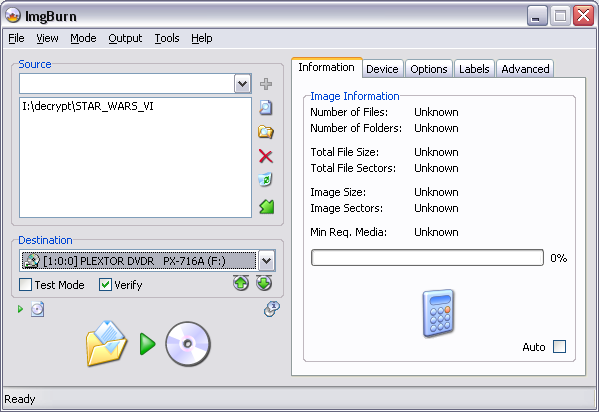
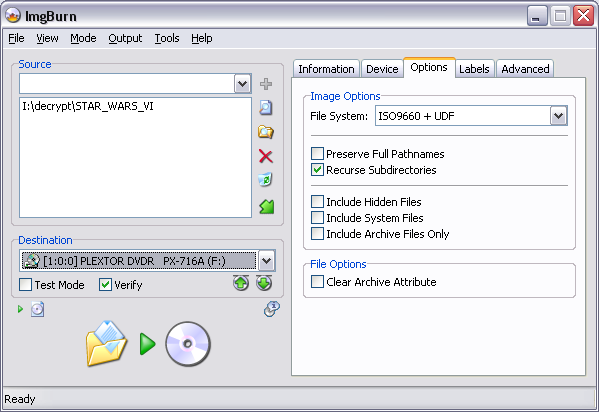
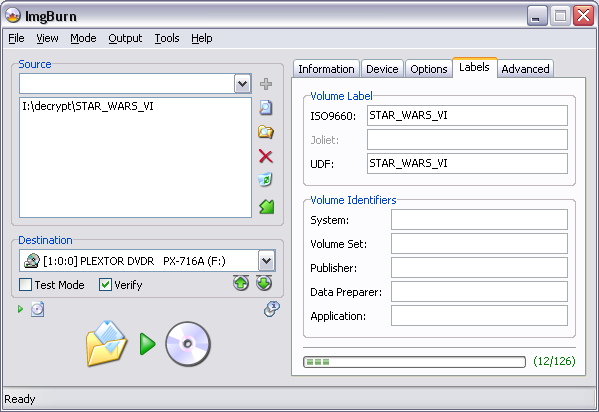
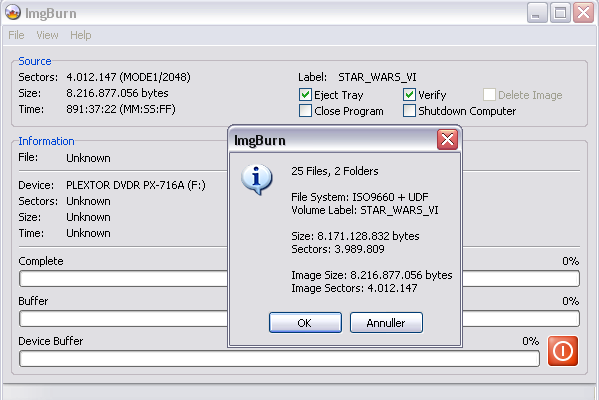
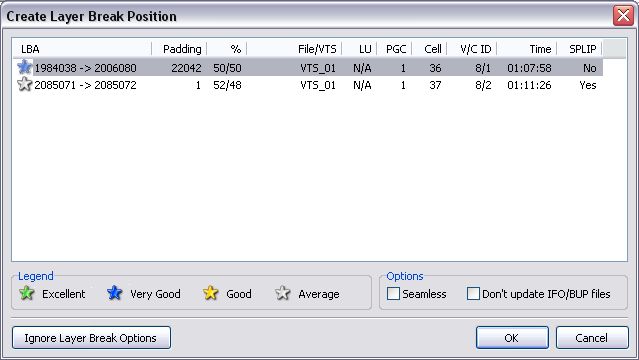
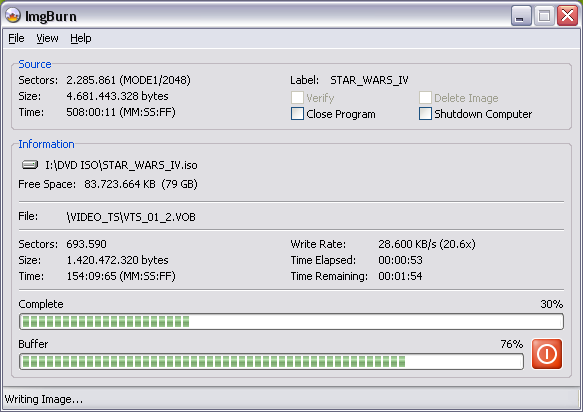
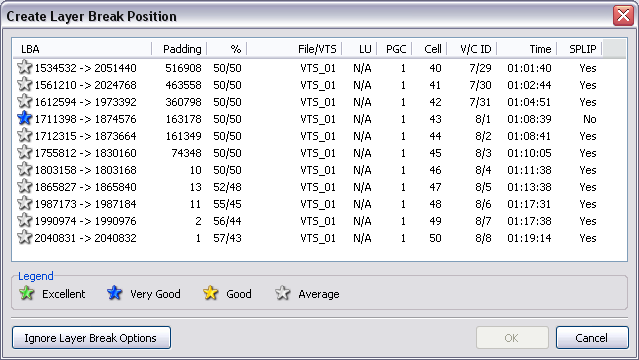
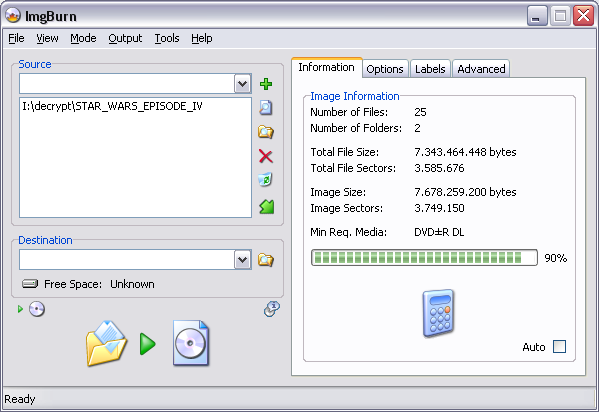
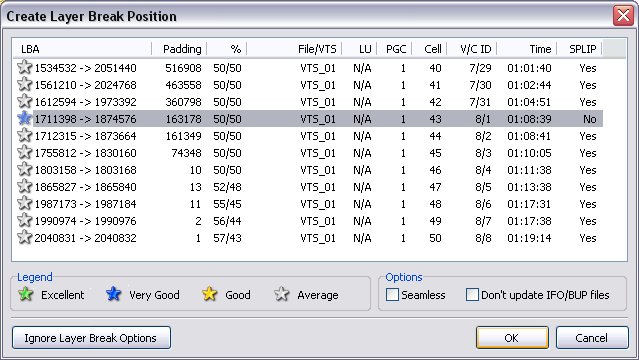
 This will cover a full set of Vob, Ifo and Bup files on your Hard Drive to Dual Layer Media. We recommend only Verbatim +R DL discs. See why here It is NOT recommended to use DVD-R DL Discs for Video. Firstly make sure your Vob, Ifo and Bup files are in a folder called VIDEO_TS then open ImgBurn in Build Mode and ensure it's set to output to Device (In the menu at the top, click 'Mode' -> 'Build', then click 'Output' -> 'Device') then choose the folder option in the source box, and navigate to the folder you stored the files. Press the calculator to make sure your project will fit on Dual Layer media. At this point you will see a similar window to the one shown below. This is where you decide which bit of the film should be the first bit after the layer jump (where the player may pause for a second as the laser moves from layer 1 to layer 2). You might get one option here or you could get several. If there's only one, it's obvious which one you need to select! If there's more than one, select the one with the best rating - look at the stars! In this example, the best option is the one with the blue star that says 'No' in the SPLIP column. Make your selection and then press 'Ok'. Choose your write speed in 'Device'. Whilst here, you can make sure your drive has bit setting set to DVD-ROM for Dual Layer media. (if your drive supports it) At this point go to the Options tab, choose ISO9660+UDF . Then go to the Labels tab and enter the label in both fields Then press the build button (Highlighted in the red box) and you will see a similar layer break window again, Normally you shouldn't worry about ticking the 'Don't update IFO/BUP files' box, and you should definintely not tick it unless you have prepared IFO's in advance containing layer break info. Press 'Ok' You will then see this window. Press 'Ok' and the programme will start writing the Disc. Then sit back and relax whilst your Disc is burning. It will be dependent on your drive, media and firmware as to how long the burn and verify will take.


-
i suppose it wouldnt hurt just to check your dma
-
how about you check the faq and then post a log so we can solve your problem and get the new version working for you. first post in the faq is about i/o errors
-
breast not to carry on with such talk
-
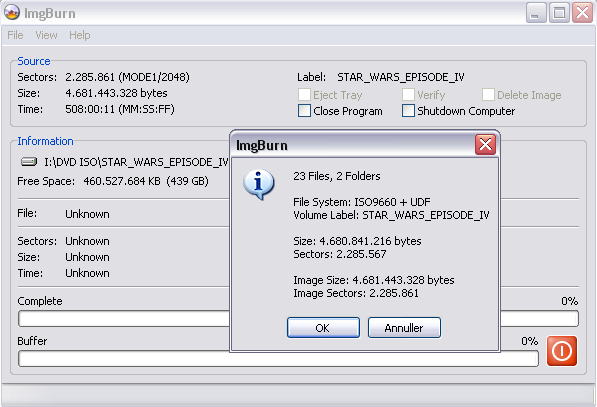
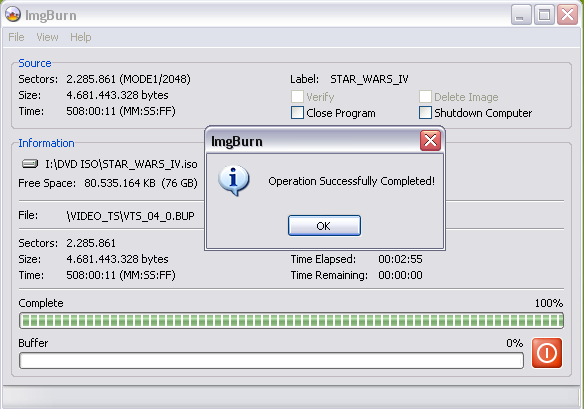
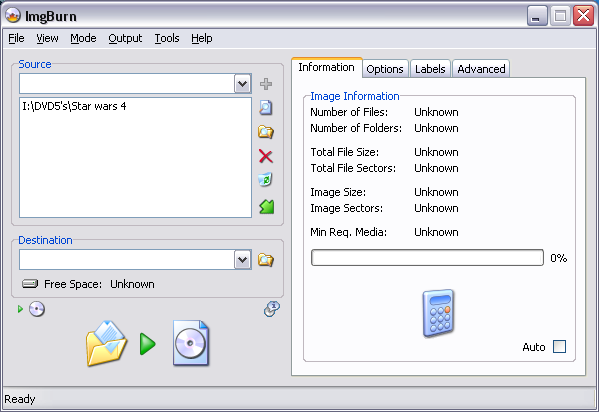
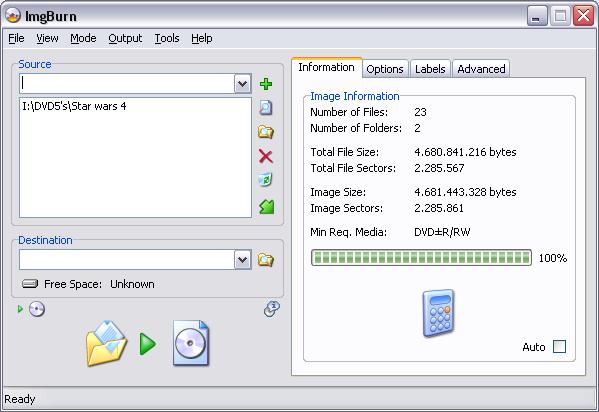
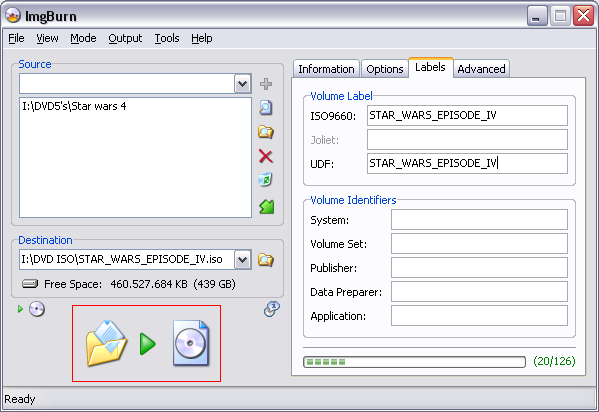
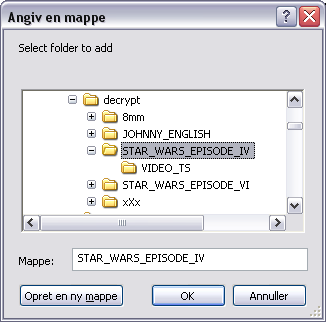
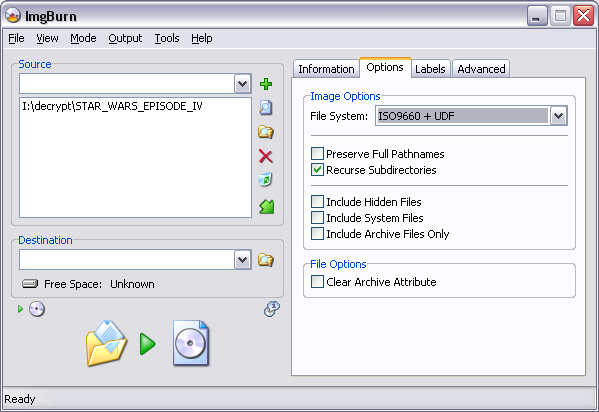
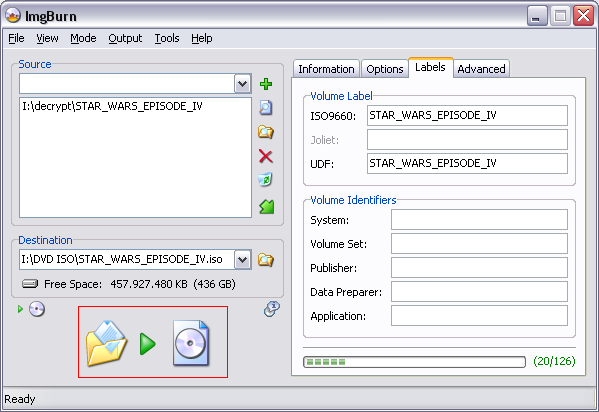
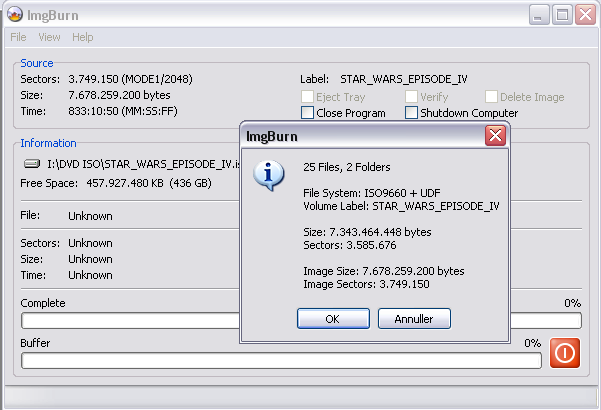
This will cover making a Single Layer ISO on your Hard Drive. Firstly make sure your Vob, Ifo and Bup files are in a folder called VIDEO_TS Next, open ImgBurn in Build Mode (Click 'Mode' -> 'Build') and switch the Output Mode to Image File (Click 'Output' -> 'Image File'). Click the 'Browse for a folder...' button in the source box, and navigate to the folder where you saved the files. When you have chosen the folder you require you can use the Calculator button to see if it will fit on the disc. At this point go to the 'Options' tab, and ensure ISO9660 + UDF is selected in the 'File System' drop down box. You should also configure the other options as you see them here in the screenshot. Next choose the 'Labels' tab and enter a nice name for your movie in both fields. This will be the 'volume label' of the disc once you've burnt it - it's what will be visible in 'My Computer' when you put the disc in your DVD drive. Now you need to enter the file name for your image file in the 'Destination' box. In this example, we use 'I:\DVD ISO\STAR_WARS_EPISODE_IV.iso'. You can enter it manually or click the 'Browse for a file...' button. When you've done that, press the Build Button. (Highlighted in the red box) You will then see the screen below: Press 'OK' and ImgBurn will start building your ISO. Then just wait a few minutes (system dependent) and your ISO and MDS (NB: MDS file is now optional for single layer discs) will be ready.


-
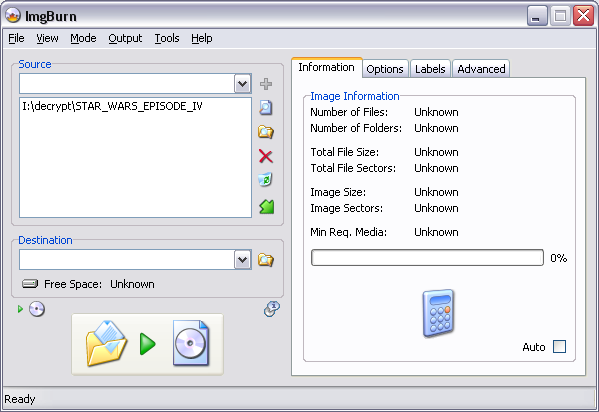
This will cover making a Dual Layer ISO on your Hard Drive. Firstly make sure your Vob, Ifo and Bup files are in a folder called VIDEO_TS then open ImgBurn in Build Mode and choose the folder option in the source box, and navigate to the folder you stored the files. When you have chosen the folder you require it should look like the picture above. Then press the Calculator and you will see a similar window to this, where you should choose the layer break. The best option here is the one on the right that says 'No' in the SPLIP column. Then press 'Ok'. The Legend at the bottom also indicates the best choices. At this point go to the options tab, choose ISO9660+UDF Next go to Labels and enter the name of your ISO in both fields. Next go to Advanced -> Media and ensure you have selected the appropriate profiles for the media you're intending to write to. If the estimated size of the image exceeds that specified in the 'Single Layer' -> 'Maximum Sectors' box, the program will know you're building a double layer ISO and configure itself accordingly. This is where the 'Double Layer' profile then comes in. If you do not select the correct profile you may have problems with the layer break when you burn the ISO file. Next choose your destination, and press the Build Button (Highlighted in the red box). The Layer Break choice window will appear again at this point. Normally you shouldn't worry about ticking the 'Don't update IFO/BUP files' box, and you should definintely not tick it unless you have prepared IFO's in advance containing layer break info. Press 'Ok'. You will then see this window. Press 'Ok' and the programme will start building. Then just wait a few minutes (system dependent) and your ISO and MDS will be ready. Remember to choose the MDS file when you eventually burn this ISO as it contains the layer break information.


-
happy birthday old man have a good day
-
you didnt format your RW disc before you used it this is a clue W 16:57:47 Retry Failed - Medium Not Formatted
-
that wasn't mayonaise
-
<--flash ?? <--corny has yours got sugar in it?
-
thread search http://forum.imgburn.com/index.php?s=&show...indpost&p=16751
-
get some decent discs and burn at 4x