

Cynthia
-
Posts
6,588 -
Joined
-
Last visited
Content Type
Profiles
Forums
Events
Posts posted by Cynthia
-
-
Tried to go in to
Main Menu -> Tools -> Drive -> Change Book Type
and set DVD-ROM back to 'Normal'.

-
All of them. Guess the OP was to lazy to write it all.

-
Hi and welcome to the forum, b kilburn!
Main Menu -> Tools -> Settings -> tab 'Registry'
Select ISO and make it to associate with ImgBurn.
As it is now they are associated with WinRar and shows up as own by that program. But the file extension should still be .iso. Perhaps you have 'hide file extensions' enabled in Windows?
-
Mac users:
Rename the files with extension i00 to i0x as follows:
- filename.i00 => filename.iso.001
...
- filename.i05 => filename.iso.006
Then use the program Split and Concat to join the files and make an ISO.
I also saw one suggestion to copy the stuff together as
cat filename.I00 filename.I01 filename.I02 ... > filename.ISOThen you can burn your .iso image with your regular program
That last one sounded so easy, so I have no clue if it will work or not. But according to the poster it works.
-
Did you select 'Drive (For +R Media)' or 'Drive (For +R Media EEPROM!)? The later one is if you want to change it forever and the first one will only apply until your restart the computer. Or do you get the error as soon as you select one of those? If you have more than one writer installed - check that the right one is selected first in the 'Write mode' window, before you use the 'Change Book Type' function.

Selected 'DVD-ROM' in this one?
-
-
-
Hi and welcome to the forum, Jahz!
There is an old discussion about your issue in this thread:
-
Do you live in a PAL country?
-
As this question involves ripping, I would suggest that you post the question in the CloneDVD forum instead, as the British law makes it tricky to help you. Your files can not be burned as a compliant DVD Video project as they are now.
-
What option in the set booktype function did you select (next write/current disc/drive/drive-EEPROM)?
-
Hi and welcome to the forum, coronaextra!
Can you post a burning log from one of the discs that had playback problems?
Main Menu -> Help -> ImgBurn Logs
-
Hi and welcome to the forum, ChiBulls2315!
You have the same burner as my first one.
Can you post the full log from the latest burn? You find it here: Main Menu -> Help -> ImgBurn Logs
Running Windows XP?
If you right click on the icon for ImgBurn on your desktop and select Properties. There are some settings that can make it run in 256 colors. Just to rule out that such a setting is enabled.
-
Didn't even bother to install it.
Could it be because it was already installed?

-
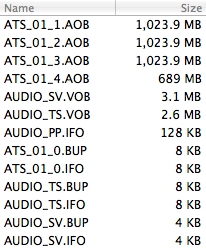
In Build mode it's possible to not create the AUDIO_TS folder.
-
Curious.
Is it an old version you have installed?
I 14:37:30 Source Device: [4:0:0] ELBY CLONEDRIVE 1.1 (J:) (SCSI) -
You should find plenty of stuff on how to make the PS2 play xvid thru a search with Google.
-
Can your PS2 play xvid stuff? I think an original one can't.
-
Or use a CD
Regards
I burned a DVD projectNot possible.
-
Did a test with Nero and it writes the same amount of sectors that the Video DVD project consists of (300MB). I did have that 1GB option enabled in Nero.
Found a discussion in this thread.
http://www.videoredo.net/msgBoard/showthread.php?t=5393
I liked this comment in that thread.
Time we all moved away from this old must do's. If the dvd player cannot handle it, so what go buy a new model and replace the old no good junk dvd player. -
I'm putting my tits and ass back up

-
4. Tools (Continued)
-
-
4.2.13 Change Book Type...
If you are burning with +R/+RW/+R DL media and your drive supports book type, also called bit setting, you can use this function. It will fool your stand alone player that the burned disc is a DVD-ROM, which in some cases makes them more compatible with players. Especially with older players it can do the trick. Only +RW media can change the book type after recording, so for +R media you need to apply the book type setting prior to the writing.

Note: You can use the refresh button to re-load the settings.
-
4.2.13.3 Lite-On
As an example I will use my Lite-On drive 'ATAPI DVD A DH20A3H'.-
Select 'Lite-On'.

. -
Select 'Drive (For DVD +R Media)'.

Depending on the brand of the drive, there might be various options for each media type. These are the Lite-On options. Select the one(s) you want to use.-
Next Write
Will only use the new book type setting for the next write. Then the default setting will be used.
. -
Current Media
Will use the new book type for the media currently loaded in the drive. As you can see I have a DVD +R disc loaded.
. -
Drive
Will use the new book type until you reboot your computer.
. -
Drive (EEPROM!)
Will use the new book type forever.
[*]Select 'DVD-ROM'.

We want to change the book type to DVD-ROM. The other options are to be used if you want to stop using the book type feature. 'Normal' means that the inserted disc has not had the book type setting changed or modified and 'DVD +RW' is DVD +RW media.
.
[*]Press the 'Change' button.
If everything worked as it should, the change is made.

The next time you write, the book type will be set to DVD-ROM. But as I have a re badged Lite-On drive, I also need to do the 'Advanced' step as shown in section 4.2.13.9 of this guide to get his information automatically in the log.
I 00:00:00 Book Type Setting: DVD-ROM
I 00:00:00 Source Media Type: DVD+R (Book Type: DVD-ROM) (Disc ID: TYG02) (Speeds: 4x; 6x; 8x; 12x)
-
Next Write
[*]4.2.13.4 NEC
NEC/Optiarc official firmware will by default only book type +R DL media to DVD-ROM and also with official NEC/Optiarc firmware only the options for +R double layer media works in the 'Change Book Type' function.
In order to change and use the settings for +R and +RW media, you will first need to flash the drive with a patched firmware, that sets the book type for you and also allows for the options in the 'Change Book Type' function to be fully working. You can read more about how to apply a patched firmware in the 'Book type +R/+RW media on NEC/Optiarc drives' guide.
With the patched firmware installed, no further actions in the 'Change Book Type' functions should be needed to carry out.
If you have patched firmware installed and also the option 'Auto Change Book Type' enabled, that is located in the ImgBurn settings in tab 'Write', this setting will always wants to book type to DVD-ROM. So if it's enabled, it doesn't matter what the temporary setting is currently set to, the program will still change the temporary setting so it book types to DVD-ROM, that's this settings sole purpose in life. If you do not want this behavior, disable the setting.
So if you for some reason temporary wants to disable the book type function to 'DVD-ROM', you need to set both the 'Permanent' and 'Temporary' value to '+R' or 'RW' and also have the option 'Auto Change Book Type' disabled.

.
The available options in 'Change For' are the ones listed below.
-
Drive - Permanent
The book type value you set here here will stay the same even after a reboot of your computer.-
Drive (For DVD+R Media)
-
Normal
Sets the book type value to '+R'.
. -
DVD-ROM
Sets the book type value to 'DVD-ROM'.
[*]Drive (For DVD+RW Media)
-
Normal
Sets the book type value to '+RW'.
. -
DVD-ROM
Sets the book type value to 'DVD-ROM'.
[*]Drive (For DVD+R DL Media)
-
Normal
Sets the book type value to '+R DL'.
. -
DVD-ROM
Sets the book type value to 'DVD-ROM'.
-
Normal
[*]Drive - Temporary
The book type value you set here here will stay the same until you turn off your computer. The 'Temporary' value will take its initial value (after a power on of the computer) from the 'Permanent' setting. The 'Active Setting' will also be set to 'Permanent'.
-
Drive (For DVD+R Media - Temporary)
-
Normal
Sets the book type value to '+R'.
. -
DVD-ROM
Sets the book type value to 'DVD-ROM'.
[*]Drive (For DVD+RW Media - Temporary)
-
Normal
Sets the book type value to '+RW'.
. -
DVD-ROM
Sets the book type value to 'DVD-ROM'.
[*]Drive (For DVD+R DL Media - Temporary)
-
Normal
Sets the book type value to '+R DL'.
. -
DVD-ROM
Sets the book type value to 'DVD-ROM'.
-
Normal
[*]Active Setting
The 'Active' option swaps between the 'Permanent' and 'Temporary' setting being the one that actually gets used for the burn.
-
Active Setting (For DVD+R Media)
-
Permanent
-
Temporary
[*]Active Setting (For DVD+RW Media)
-
Permanent
-
Temporary
[*]Active Setting (For DVD+R DL Media)
-
Permanent]
-
Temporary
-
Permanent
[*]Reset Change Counter
Every time you change the 'Permanent' setting the counter of available changes will be reduced by the number 1. If you wish to restore the counter to the original value of 500 you can do it with this function.
It also resets the book type options to factory defaults.
-
Reset
Select this value and press the 'Change' button and the original value will be restored.
-
Drive (For DVD+R Media)
An example
As an example I will use my Optiarc drive AD-7240S to show how to book type +R single layer media to 'DVD-ROM'. Remember that with the patched firmware installed, this step is not necessary.
As we want to make a permanent change of the book type to 'DVD-ROM' on +R single layer media, we first select the value 'Drive (For DVD+R Media)'. This will make it remember the new setting even after a reboot of the computer.

When we have selected this option, we will now also see the current setting. This setting we want to change to 'DVD-ROM'.
Select 'DVD-ROM' in the drop down list for 'New Setting'.

Press the 'Change' button for the change to be carried out and if everything worked as it should, the change is made.
The next time you write a +R single layer disc, the book type will be set to DVD-ROM.
I 00:00:00 Book Type Setting: DVD-ROM
I 00:00:00 Source Media Type: DVD+R (Book Type: DVD-ROM) (Disc ID: TYG02) (Speeds: 4x; 6x; 8x; 12x)
.[*]4.2.13.9 Advanced
If you have an OEM drive from, BenQ, LG, Lite-On, NEC, NuTech, Plextor, Ricoh or Samsung, this function makes it possible to add the OEM drive in a table, so that ImgBurn can read the current status settings that you have applied. If you have already applied this in the 'Advanced' feature in the 'Change Advanced Settings' function (section 4.2.12 of this guide), there is no need to do it here as it's the same function.
As an example I will use my 'SONY DVD RW DW-Q30A' drive, a re badged Lite-On SHW-1635S drive.
-
Press the 'Advanced' button.
. -
Select the 'real' manufacturer of your drive in the 'Drive OEM' drop down box.
I select 'Lite-On'.

. -
Type in the ID string of your drive as it is visible within the main program window.


. -
Press the 'OK' button.
The next time you write to a disc, you will have the enabled Lite-On book-type feature for the drive to show up in the log.
I 00:00:00 Book Type Setting: DVD-ROM
I 00:00:00 Source Media Type: DVD+R (Book Type: DVD-ROM) (Disc ID: TYG02) (Speeds: 4x; 6x; 8x; 12x)
-
Select 'Lite-On'.
[*]4.2.14 Sector Viewer
The 'Sector Viewer' function is useful for visual inspection of individual drive sectors
.

-

Sets LBA to the last value on the current loaded media.
. -
LBA
Logical Block Address (LBA) is an addressing scheme; blocks are located by an index, with the first block being LBA=0, the second LBA=1, and so on up to (N-1), where N is the number of sectors on the disk.
Only the contents of the 2048 byte User Data Field is showed as default.
. -

Jumps to the previous sector.
. -

Jumps to the next sector.
. -
Refreshes the window and re-reads the LBA from the media.
. -

Reads the media in RAW mode, 2352 bytes per sector. Useful for CD-DA media that uses all of the 2352 bytes per sector for audio data.
. -

Same as RAW read, but it also includes 96 bytes of sub channel data. On CD-DA they are either filled with nulls or they can be used for CD-TEXT.
. -

Loads the tray in the selected drive.
. -

Ejects the tray in the selected drive.
[*]4.2.15 Display IFO Layer Break Information...
This function will display the physical layer break information on a double layer disc.

It's also possible to preview the cell before and after the layer break.

.
[*]4.2.16 Regional Code
-
4.2.16.1 Information
This will show you the current 'Regional Code' setting for your drive.

If you should see this window, it will in most cases mean that your drive is flashed with region free firmware.

. -
4.2.16.2 Change
This function allows you to change the current 'Regional Code' for your drive. New drives have no 'Regional Code' set, you need to do this by selecting the region that you are living in, or to another region if you want that.
Just remember that you can only change this setting five times. The last 'Regional Code' you set it to, will be to that one forever. If you have a NEC drive, it can still be changed by using an external tool such as the 'NEC RPC2 Reset Tool'.

If you should see this window, you can't change the 'Regional Code' because you have a region free firmware installed.

[*]4.2.17 Capabilities
This shows your selected drives capabilities.

.
[*]4.2.18 Family Tree
Feature to display the 'Family Tree' of a device - i.e. which controller it's connected to.

.
[*]4.2.19 Check For Firmware Updates...
From time to time, drive makers test additional brands of DVD discs and then update their firmware with new write strategies for those newly tested discs, enabling their drives to work with more brands of DVD discs.
This function will help you to see if there is a new firmware available for your drive. You need to be connected to the Internet in order for it to work. The program searches 'Firmware HQ' and shows you available firmware updates for your selected drive. It also shows you the current installed firmware version.


If you find a new firmware version, think of this before you do the update.
- No disc in the drive.
- The tray closed.
- All other programs closed.
- Don't turn off the power during the update.
When the update is done, restart your computer.
-
4.2.13.3 Lite-On
-
4.2.13 Change Book Type...
-
-
Two Ixx files shouldn't take you over the 4.7GB size limit if you use default setting for file size split.
Sure you loaded the .mds file when you tried to burn it? It's a blank DVD disc and not a CD disc you are trying to burn to?
-
As I can understand it you can't read the previously burned disc with either ImgBurn or Nero.
Sounds as a bad burn to me. Do you verify your discs in the stage after the writing stage when you burn? Scratched/dirty disc surface?
Split Image question for Mac users
in ImgBurn Support
Posted
Yes, that's why it sounded odd that it should work.